Quantcast
Channel: Enfold Documentation
Viewing all 80 articles
Browse latest View live

Theme Registration

$
0
0

Theme Registration

Overview

After buying and installing the theme from ThemeForest, registering your theme is an important step to ensure you will receive valuable theme updates that include new features and keep your website secure.

Register my theme

If you already have an Envato Personal Token go ahead and register your theme.

Register your theme with a personal token

Enter your personal token and register your theme from Enfold > Theme Update > Enter a valid Envato private token.

Success Message

If the personal token you entered is correct, you will notice a success message as seen below:

Error Message

If the token you entered does not have the proper permissions or is entered incorrectly you will notice an error message as seen below. You can try some simple troubleshooting steps to resolve the issue.

If you do not have a personal token please continue reading this post, we’ll walk you through the steps to create an Envato personal token and register your theme.

What is an Envato personal token?

A personal token is required to link your Envato Account to your theme and verify your purchase to receive future theme updates.

Until now Envato used API keys to handle the ThemeForest and CodeCanyon product registration and update notifications. For better service, Envato has decided to deprecate its old API key and move towards registering the products using a personal token.

Since the old Envato API will soon be shut down, we recommend registering your Enfold theme version higher than 4.4.1 using the personal token to receive future theme updates. In Enfold version 4.5 or higher, you will no longer notice the old API key and Envato username options. The old API is supported for backwards compatibility by Enfold until the user adds the private token. The old username/key are displayed in read-only input fields and are completely removed from DB when the private token is entered. Instead, you will be asked to enter an Envato Private Token and register your theme.

NOTE: If you already registered your theme using the old API key and Envato username in Enfold 4.4.1 or previous versions, you’ll need to re-register your theme using the new Envato personal token.

How to generate a Envato Personal Token?

Before we start please make sure that you log in to your Envato account with the same username from which you have purchased the theme and follow the step by step guide to generate a personal token.

Step 1: Access Envato Token page

To generate your personal token, go to Envato create a token page. If not logged in please use your Envato credentials.

Step 2: Set required Token Permission

Your Token needs specific permissions to verify the purchase and link your Envato account to the theme. Before you create a new token the following should be selected from the list of permission available on the Token page.

  • View and search Envato sites (checked by default)
  • View your Envato account username
  • View your email address
  • View your account profile details
  • Download your purchased items
  • Verify purchases of your item
  • List purchases you’ve made

You will notice a similar screen when you access the token page.

Step 3: Create a new Token

After selecting the required permissions, read the Terms and Conditions and agree to create your new token.

Once you click on Create Token button a new screen will pop up with a Success! message and a Private Token.

Copy and save your token on your local system. Confirm you’ve copied it successfully and click the Woohoo! Got it. button to complete the Token Creation.

After completing the steps above, you are now ready to register your Enfold theme. Go to Enfold > Theme Update > Enter a valid Envato private token and enter your token.

Your Token should be kept private just like any of your passwords. Please do not post your token in a public forum, it can actually be misused by others. As Envato does not store your Token key please save it in a secured place so you can access it if necessary and use it in case you have to reinstall the theme and register again to receive updates.

In the worst case, if you lose the token key, you can create a new Token and re-register your theme. Once the token is created you can only edit the permission or delete the token key.

Troubleshoot

If you are unable to register your theme using the newly created Token key, please follow the below steps.

  • Verify your Token is not missing any characters when you copy it from the source.
  • Go to Envato account and recheck your token permission.
  • Create a new token and try again.
  • Install the Envato market plugin and set up your token key to get new theme updates.
  • If you still have an issue please open a support ticket.

Quick setup

$
0
0

I installed enfold what next?

Overview

Let the fun begin. After installing the enfold theme the next step is to make it look unique and match your branding style by changing the default settings.

Before we start

While setting up a fresh WordPress site with no content or updating an existing site, it’s a good idea to let your website visitors know what is happening by quickly setting up a maintenance mode or a coming soon page than displaying an incomplete or a broken website.

Maintenance Mode

Maintenance mode helps you display an under construction or a coming soon message to your website visitors. To set up a maintenance page please follow the below steps.

WordPress has many plugins available for this purpose each with different features, give WP Maintenance Mode plug-in a try or browse the WordPress plug-ins directory for more maintenance mode plugins.

Coming Soon Page

  • Use a pre-built coming soon page or the maintenance mode page that comes with enfold 2017 demo or create your own coming soon page and if required, add the subscription or notification form.
  • Set it up as your front page from Enfold > Theme Options > Frontpage Settings.

Plugin Requirement

Some demos require additional plugins to be installed so you can utilize all the features. If you notice the list of demo sites each demo has its own description and recommendation of plugins as shown in the below screenshot.


To install the recommended plugin go to WordPress Dashboard > Plugins > Add New and search for the plugin and click on install. After the plugin is installed it is required to be activated by clicking on the activate plugin option.

Import Demos

Enfold comes packed with beautiful demo sites which can be installed and easily customized to match your branding or make it your own unique site. Click here to view all of Enfold demos.

One Click Install Demo: Importing a demo site and adding/replacing the content is a great way to get started. To import the demo with a single click simply go to Enfold > Import Demo and import the demo that suits your business.

Please note that importing demo sites will reset the theme options. If you have made changes to the theme options and would like to import the demo pages without losing the settings in theme options you can try importing the demos manually.

Backup and restore theme settings

Theme Settings: You may have spent some time customising and styling the theme elements like header style, colors, content style, fonts and many other options. Enfold theme options can be exported or imported very easily from the Import/Export tab.

Export/Backup Settings: Go to Enfold > Import/Export tab.

Note: After importing the theme settings file, to see the changes, please make a small change in the theme options by changing the font size or color and save the settings.

Quick Setup

Let us take a quick look at some options that will allow you to make some quick changes to set up your site fast. We will start with setting up the Logo, Color scheme, Typography and progress to other elements.

Logo Setup

The first step to personalize the theme is to upload your own logo. There are two different options to upload the logos default logo and the transparent header logo.

Preparing your Image
We recommend using a .png image with a maximum size of 340px wide by 156px tall. Logo can be uploaded from Enfold > Theme Options > Logo

  • Transparent header logo: When the page is scrolled the color and size of the logo area may change (depending on the theme setting) and a different logo can be displayed when the page is scrolled from Enfold > Header > Transparency Options > Transparency Logo.

Favicon setup

If you aren’t familiar with Favicons, they are the little images that show in the browser tabs or bookmarks for a site. They take a bit more care when creating the image file since they are so small, but there are some great resources on the web to make that easier.

Setting up Your File
A quick Google for “Creating your own Favicon” should help you find one of the many sites available these days which will help you in creating your file.

Upload the Favicon file
Once you have your new favicon created and read you can upload it to the Theme Options main tab and the theme will then add it to the site code so that browsers can recognize it.

Make sure to click on the Save all changes button at the top or bottom of the options page to save your new theme settings

Color scheme

The theme comes with predefined color schemes that can be used out of the box or modified if needed. Once you select one of the colors it changes all of the values in the tabbed options below as well as the live preview box.

The theme colors are separated in different theme sections: General, Header, Main Content, Alternate Content, Footer and Socket. You can apply link colors, font colors, backgrounds etc to each section. As soon as you change the value of some of the input fields the small preview window will update and show you how your new style looks like.
Color scheme are a set of a predefined color scheme which can be accessed from Enfold > General Styling > Select a predefined color scheme. To get started with custom styling your Enfold theme choose a color scheme that is close to your design and edit the options in General Styling below the selected color profile.

*Note: When you click on Save all Changes the options for your styling are not saved to the pre-defined color schemes. Those will always load the same pre-defined options when clicked.

Advanced styling options

Advanced Styling Option can be accessed from WordPress Dashboard > Enfold > Advanced styling. Here you can select elements such as the menu, button, headings or any other element from the drop-down list. The default styles can be customized by adding new values to any of the element in the advanced styling option.

Typography

Typography options in Enfold theme can be accessed from Enfold > Advanced Styling. Select any element like body, paragraph, heading tags,  menu or other tags available in the drop down list and edit the font family, font size, font weight and line height.

The text color for different sections of the site like header, footer, main content and other areas can be changed from Enfold > General Styling.

Background Styles

Body background options work great if a ‘boxed’ or ‘framed’ layout is selected from Enfold > General Layout > Layout

Background color or image for the site can be changed from Enfold > General Styling > Body Background

Background video can be set from the options available in the color section element. This looks great if you are using the color section element with the video background on a stretched layout.

Remove Borders around header, sidebar and other content

To remove the borders around menu, sidebar area please clear/delete the border color value found in Enfold > General Styling > Logo Area, Main Content, Alternate content and save changes.

Page preloader

Page Preloader is a nice way to indicate that the content of the page is loading. It is best to use them on web pages with heavy content that takes time to load. The preloader option can be easily enabled or disabled with a custom preloading logo or image from Enfold theme options > Page Preloading.

Menu setup

Pages, Posts, Products, Tags, Custom Links, Categories and much more can be added to the menu items. First, enable the required boxes from the ‘Screen options’ on the top right of the Appearance > Menu page to be able to add them to the menu.

Create or select the menu which you need to add/edit items.

Drag and drop the menu items from the list of pages and other options available on the left side to the menu items which can be seen on the right side.

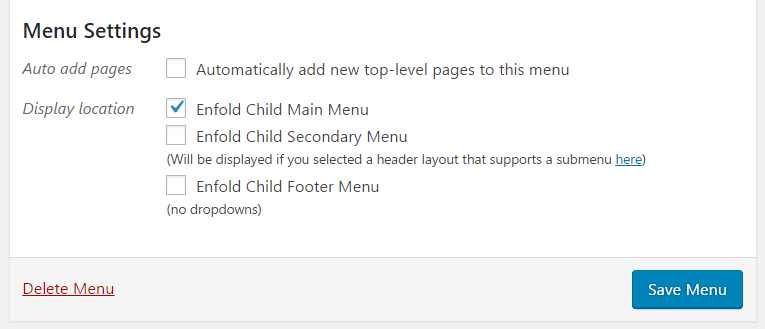
Finally, select the display located at the bottom of the screen before saving the menu.

WordPress Codex has a section dedicated to Menu setup and has detailed information please check WordPress Codex Menu Setup tutorial.

Header style

The Enfold theme brings you beautiful and eye-catching header styles. All the header layouts come with a logo, menu and widget spots, and ability to change the layout style, header behavior and other styling properties.

Header layout option can be accessed from Enfold > Theme Options > General layout > Logo and Main Menu

Header style and behavior can be changed from Enfold > Theme Options > Header

Social profile setup

Social profiles for most of the popular networks can be set from Enfold > Social Profiles by selecting the social network name and adding the link to your social profile.

Social icons can be activated for blog, header, and footer from the blog, header and footer option in the theme settings.

Custom Footer

Enfold by default display widgets in the footer area. The widgets in the footer can be customized from Appearance > Widgets > Footer.

The theme has more footer settings in Enfold > Footer which allows you to:

Display or Hide the footer widgets and the socket area.
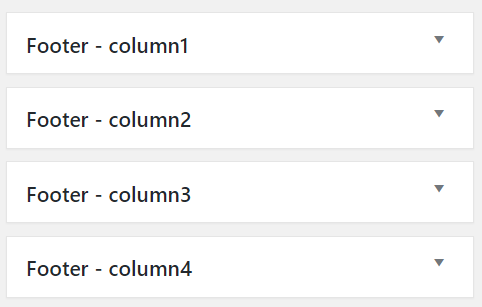
Add up to 5 footer columns.
Update the Copyright info.
Display Social icons in the socket area.
To remove the backlink add the below shortcode in the copyright field.

[nolink]
Html links or custom text can be added in the copyright field as shown below. If you would like to display a button here, a button shortcode can also be added in place of Html tag.

Copyright – MyService

Sidebar/Widget setup

By default, the Sidebar options set in Enfold > Sidebar Settings are applied to all the pages however the default sidebar settings can be overwritten on any page using the sidebar settings provided in the page itself under Layout > Sidebar.

For example to hide the sidebar only on contact page open the contact page, on the right side under layout options > Sidebar Settings you can choose to hide the sidebar.


From the Enfold> Sidebar Settings you can choose to display the sidebar on the left or right side of Archive, Blog, Single Post, Pages, Smart Phone and update settings for Sidebar navigation and Sidebar Separator Styling.

Sidebar Widgets: Sidebar widgets like Recent Posts, Comments, Categories, Meta, Images, Custom text, Social profile and many more widgets can be added or deleted from Appearance > Widgets > Sidebar.

General Layout

As the term suggest the “Layout Dimension” option will allow you to adjust the width of the layout and fine tune the sidebar and the content width.

Layout Settings

The Layout options can be accessed from Enfold > General Layout.

In the Layout option, you can set the layout to be:

  • Boxed
  • Stretched
  • Fixed Frame

Dimension Settings

The Dimension of the site content can be set from Enfold > General Settings > Dimension

The Dimension tab will allow you to set up

  • Adaptive content width for easy viewing on a portable device.
  • Content Width
  • Sidebar and the content ratio
  • Total width content and sidebar together can take of the “content width” described above.

Adjust Default Values of the Layout Settings

If you don’t want to set the Layout > Settings for each page or post manually, use the following filter in the functions.php file. The Layout and their designated keys are included in the comments below.

  • Layout > Sidebar Setting
  • Layout > Footer Settings
  • Layout > Title Bar Settings
  • Layout > Header visibility and transparency

add_action( 'after_setup_theme', 'ava_enfold_builder_layout_mod' );
function ava_enfold_builder_layout_mod(){
add_filter('avf_builder_elements', 'avf_enfold_builder_layout_settings_mod');
}

function avf_enfold_builder_layout_settings_mod($elements)
{
$counter = 0;
foreach($elements as $element)
{
// Layout > Sidebar Settings
if($element['id'] == 'layout') {
/**
*
* Available Options
* No Sidebar = fullsize
* Left Sidebar = sidebar_left
* Right Sidebar = sidebar_right
* MOD: Set the Layout > Sidebar Settings to "No Sidebar"
*
**/
$elements[$counter]['std'] = 'fullsize';
}

// Layout > Footer Settings
if($element['id'] == 'footer') {
/**
*
* Available Options
* Display only the socket (no footer widgets = nosocket
* Display only the footer widgets (no socket) = nofooterwidgets
* Don't display the socket & footer widgets = nofooterarea
* MOD: Set the Layout > Footer Settings to "Display only the footer widgets (no socket)"
*
**/
$elements[$counter]['std'] = 'nofooterwidgets';
}

// Layout > Title Bar Settings
if($element['id'] == 'header_title_bar') {
/**
*
* Available Options
* Display title and breadcrumbs = title_bar_breadcrumb
* Display only title = title_bar
* Display only breadcrumbs = breadcrumbs_only
* Hide both = hidden_title_bar
* MOD: Set the Layout > Title Bar Settings to "Hide both"
*
**/
$elements[$counter]['std'] = 'hidden_title_bar';
}

// Layout > Header visibility and transparency
if($element['id'] == 'header_transparency') {
/**
*
* Available Options
* No transparency =
* Transparent Header = 'header_transparent'
* Transparent Header with border = 'header_transparent header_with_border'
* Transparent & Glassy Header = 'header_transparent header_glassy '
* Header is invisible and appears once the users scrolls down = 'header_transparent header_scrolldown '
* Hide Header on this page = 'header_transparent header_hidden '
* MOD: Set the Layout > Header visibility and transparency settings to "Hide both"Header is invisible and appears once the users scrolls down"
*
**/
$elements[$counter]['std'] = 'header_transparent header_scrolldown ';
}

$counter++;
}
return $elements;
}

WordPress Security

Every day there are many websites that fall victim to hackers and other malicious scripts and virus attacks so it is better to be safe than sorry. We recommend installing the below mentioned or similar security plugins and secure your website. Do not give hackers an easy chance to destroy your hard work in seconds.

Page Setup

$
0
0

Page Setup

Overview

Let’s take a quick look at how we can use the enfold theme to set up some of the main pages of your site like the Homepage, Blog, Portfolio, Shop, etc.

Coming soon page

If your website is not yet up and running but if you have a domain name, it’s time to set up a coming soon page for the following reasons:

  • Use a coming soon page to communicate important announcements about your website launch.
  • It takes very little time to set up a coming soon page.
  • Generate a subscriber base before your website is launched.
  • You can set up a private site and work on it in the background while the coming soon page is visible to the public.
  • Moving your site from a local host to a live site can be stressfree and a smooth process. You can move the content to the live site and make edits to it in the background, Once you are happy with the preview of your site it is only a matter of changing the default homepage to activate your site.

Let’s look at a few ways we can add a coming soon page.

Settings

A few settings you need to know to set up a coming soon page:

Any page including a coming soon page can be set as a front page from WordPress > Enfold > Theme Options > Frontpage Settings.

Activate the Maintenance mode from

Use a pre-built coming soon page

Use a pre-built coming soon page that comes with enfold 2017 demo.

Copy the coming soon page shortcode and reproduce it on your site by pasting the shortcode. Don’t forget to set up the email address and update the page with your content

Custom build your coming soon page

Create your own coming soon page using the advanced layout builder elements such as the color section, sliders, rotating headline elements, subscription form and other elements that suit your design.

Use a plugin

There are many coming soon page plugins available in the WordPress plugin repository. We have not tried all the plugins but if it is something that suit your requirement please feel free to instal a plugin and set up the coming soon page.

Maintenance mode

Maintenance mode helps you display an under construction or a launch message to your website visitors. To set up a maintenance page please follow the below steps.

Settings

A few settings you need to know to set up a maintenance mode page:

A maintenance mode page can be set as a front page from WordPress > Enfold > Theme Options > Frontpage Settings.

Activate the Maintenance mode from

Use a pre-built maintenance page

Use a pre-built maintenance mode page that comes with enfold 2017 demo.

Copy the page shortcode to an empty page on your site and reproduce the same layout. Don’t forget to set up the email address and update the page with your content.

Custom build your maintenance page

Create your own maintenance mode page by using the page builder elements such as the color section, sliders, rotating headline, subscription form and other elements that suit your design.

Use a plugin

There are many maintenance mode plugins available for WordPress. Each plugin offers a unique approach and different features, browse the WordPress plug-ins directory and give one a try.

Custom 404 page

Unfortunately, pages like the 404 page or search result page cannot be created using the page builder.

To create a custom 404 page  you need to edit the following files:

wp-content\themes\enfold\Enfold\404.php
wp-content\themes\enfold\includes\error404.php

Or use a 404 plugin that suits your requirement.

For a detailed tutorial on how to create a 404 page, please refer to this External Resource

Homepage setup

Any WordPress page or a static page which you may have designed and uploaded to the root directory of the WordPress site can be set as homepage from Enfold > Theme Options > Frontpage Settings

Except for the front page of your site all other pages can be linked to the main menu from WordPress > Appearance > Menu

About page

Let your users know about your business by adding an about page to your site. A typical about page can be built using the images, text, headings, progress bar, testimonials and team member elements. You can add other elements from the page builder to suit your design.

Here is an example of the About page and its shortcode.

Blog

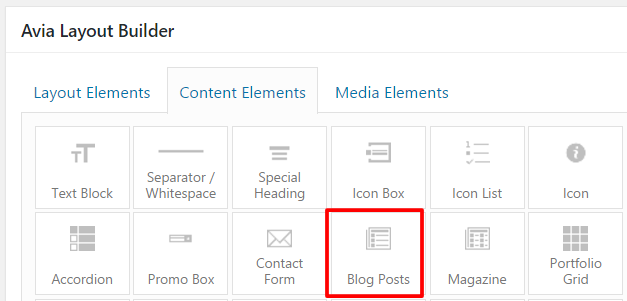
Blogs are very useful to post regular updates. To set up a blog page create a new page and add the “Blog posts” element from the Advanced Layout Builder > Content Elements.

For more advanced options click on the blog post element and select the options to customize it accordingly.

You can set up the main blog page from Enfold > Theme Options > where do you want to display the Blog?


Enfold comes with several blog layouts such as:

To view all the blog layouts in action check out our overview page. Different blog layouts can be achieved by using the Blog Posts element in the Advanced Layout Builder. For more in-depth tutorials please check the Blog Post section.

Portfolio

Add your portfolio items from WordPress Dashboard > Portfolio Items > Add new.

Showcase your portfolio items by setting up an overview page. Select the “Portfolio Grid” element from the Advanced Layout Builder > Content Elements and play with the various options available to create your portfolio overview page.


Enfold comes with the following portfolio layouts:

Portfolio Overview Page

Portfolio Single Page Examples

Shop

To add products to your site and set up an online shop you need to Install and activate the WooCommerce plugin from WordPress Dashboard > Plugins.

After you activate the WooCommerce plugin the products and shop options are automatically enabled.

New products can be added from WordPress Dashboard > Products.

To setup, various shop layouts create a new page and add the “Product Grid”  element from the Advanced Layout Builder > Plugin Additions.


Create different product archive pages or single product layouts using the other shop elements available in the Advanced Layout Builder > Plugin Additions.

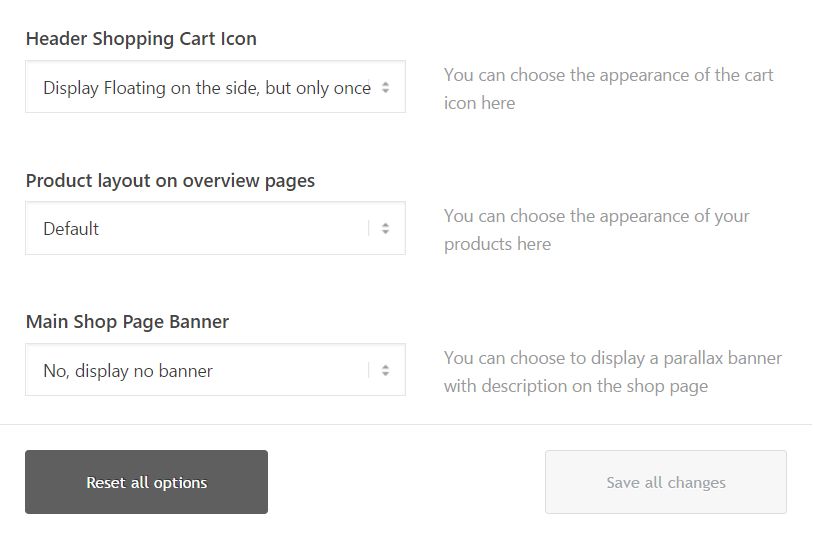
Change the settings for cart icon, product layout and main shop page banner etc from:

  • Enfold > Shop Options
  • WordPress Dashboard > WooCommerce

Shop Example

Product Examples

Contact page

A contact page on your site will be useful for your visitors to send a message to the website admin. To add a contact form on your page please use the contact form element from the advanced layout builder and set up the email address in the contact form element options.

An example of the contact page and its shortcode.

Sidebar options

By default the Sidebar options set in Enfold > Sidebar Settings are applied to all the pages however the default sidebar settings can be overwritten on any page using the sidebar settings provided in the page itself under Layout > Sidebar.

For example to hide the sidebar only on contact page open the contact page, on the right side under layout options > Sidebar Settings you can choose to hide the sidebar.


From the Enfold> Sidebar Settings you can choose to display the sidebar on the left or right side of Archive, Blog, Single Post, Pages, Smart Phone and update settings for Sidebar navigation and Sidebar Separator Styling.

Widgets

Sidebar Widgets: Sidebar widgets like Recent Posts, Comments, Categories, Meta, Images, Custom text, Social profile and many more widgets can be added or deleted from Appearance > Widgets > Sidebar.

Import Demos

$
0
0

Import theme demos

Overview

Enfold theme can be easily customized to look unique and beautiful, check out some of the enfold demos. The demo sites can be installed with just one click and it is easy to add your content and build upon it.

Import demos

Backup theme settings

Your WordPress theme can be customized to look and feel different from other sites by changing the default theme styles and settings. It may be a time-consuming process, but once you are happy with the changes it is recommended to back up and save your theme settings from Enfold > Import/Export tab.

How to import a theme demo

Importing a demo site and customizing it is a great way to save you some development time. The demo sites can be imported from Enfold > Import Demo.

NOTE:  Most of the demos can be imported with all the demo contents. However, for some demos due to copyrights issue, you may have to add replacement images.

Also, note that importing demo sites will reset the theme settings.

How to import demos without losing the theme settings.

To import new demos without losing your current theme settings please try one of the below methods:

Export/ Import theme settings.

  1. First, export the theme settings from Enfold > Import/Export tab.
  2. Import the demo theme of your choice.
  3. Overwrite the new settings with your old setting by importing back the settings file we saved in step 1.

Import only the demo content using XML files.

  1. Import the demos manually using the XML files provided in the theme. This ensures that only the demo pages and posts are imported and not the theme settings.

Manual Demo Import ( Using XML Files )

Manual Demo Import:  If for some reason demo import from the theme options does not work for you, the demo site’s can be manually imported using the XML files provided in the theme.

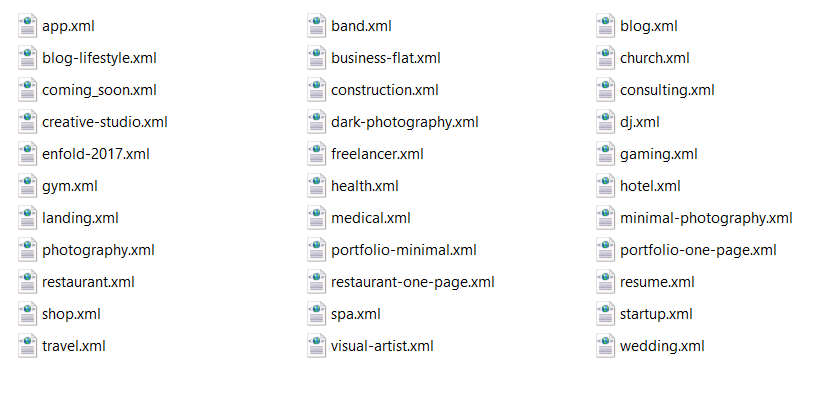
The XML demo data can be found in wp-content > themes > enfold > includes > admin > demo_files

To import the XML demo data manually go to Admin > Tools > Import > WordPress (Install the WordPress Importer if it is not installed).

Once you choose the demo file to import, select the checkbox option “Download and import file attachments” while importing.

Please note this will not import the theme settings, you have to set them up manually and upload any images that are missing from backend once the XML file is imported.

If WordPress fails to import the XML file, an alternate solution to try is to import the demo on a local server like Xampp and move the demo site to your live server using a WordPress migration plugin.

How to remove the Demo Import tab from theme options

To remove the “Import Demo” tab from the theme options panel add the below function to your child theme functions.php file

[avia_codeblock_placeholder uid="0"]

Remove Demo Data

Sometimes after importing the demo data, you may wish to reset your WordPress site and start with a new Demo. Since the demo data is stored in the database, it is very easy to remove the demo data completely from the database by using a plugin like WordPress Database Reset

Troubleshoot

Imported demo site don’t look similar to live demos

After importing the demos if your site is not displaying the demo site please check if a static homepage is set in WordPress Dashboard > Settings > Reading – if yes please deselect the static page option and select the correct homepage in Enfold > Frontpage Settings.

Importing the demo content won’t reproduce the demo page exactly, but it imports the pages. Some of the content like images, etc, might not be imported due to license requirements and limitations of the import script, such as dynamic templates aren’t supported by the demo content importer.

Everything on the demo site is a combination of Advanced layout builder elements like Headings, Product Slider, Horizontal Ruler and much more.

Importing a demo on a live site, where you have already set up pages, may cause issues and overwrite your current changes/settings so it isn’t recommended. The best way to see how things are set up in the demo is to create a test installation of WordPress, install the theme and then import the demos. This will install basic pages, posts, products and change all the settings to what the demo has.

Demo import don’t work or demo data install error

If the demo files fail to import, please set a higher memory limit in WordPress config file and if possible increasing the memory on the hosting server.

Access wp-config.php file in the root directory and add the below line to increase the WordPress memory limit. For a detailed explanation please check WordPress Codex.

define('WP_MEMORY_LIMIT', '256M');

Failed to import

If you notice an error message “Failed to Import media” or ” Media already exists” basically the theme is saying that the files you are trying to import already exist so it is not able to import again.

Please remove the old demo files by using a plugin like Database Reset  (warning all content will be deleted from your site). We recommend trying this only on new installation without any content.

Install enfold theme

$
0
0

How to Install or Update Enfold theme?

Overview

Enfold is one of the most loved, most popular and highly rated theme. It’s packed with user-friendly features, beautiful designs and it is deeply integrated with commonly used third-party services like WooCommerce, WPML, MailChimp, Events Calendar and other popular plugins.

Enfold comes with a wide range of ready to use demos and help you easily set up a shop, business site, personal blog, portfolio, agency, travel website and a lot more. Assuming you have already installed WordPress let’s take a look at installing enfold, importing demos and keeping it secure and up to date.

Preparing to install

What is required?

Back up your work

  • Backup database
  • Import/Export custom post types using plugins

Organize theme files

Usually, the downloaded theme package includes additional files such as the documentation and demos. The additional files and format that is not recognised by WordPress may cause an error message to be displayed.

Unpack the downloaded package and upload only the enfold folder with the theme files or just download the Installable WordPress file to upload via WordPress dashboard.

Theme Install

Dashboard Install

To install a theme from WordPress dashboard navigate to Dashboard > Appearance > Themes and click on the “Add New” option on the top.

In the next screen click on the “Upload Theme” option.

Browse the downloaded theme file and install.

To re-install enfold theme via the WordPress dashboard without losing data.

  • Go to Appearance > Themes page and first, deactivate the active enfold theme as active themes cannot be removed.
  • Activate the default WordPress theme.
  • View the theme details of the theme you like to delete and click “Delete”.
  • Upload a freshly downloaded copy of the theme from ThemeForest.

FTP Install

To understand FTP think of it as a folder with a lot of sub-folders just like it is on your local system.

  • Log into your FTP account using an FTP program like FileZilla.
  • Locate the WordPress installation folder and browse to wp-content/themes.
  • In WordPress dashboard, we uploaded a zip file but via FTP we need to extract the theme files from enfold.zip and upload the enfold folder with the theme files.
  • Upload the main theme files to wp-content/themes/enfold and upload the child theme files to wp-content/themes/enfold-child
  • Both parent and child theme should display in Appearance > Themes page.
  • Activate Enfold Child theme from Appearance > Themes page.

Re-install or Update using FTP

Worried about losing data when re-installing the theme via FTP?

Well, do not worry the pages and posts you have created will be safe in WordPress database and we are not going to make any changes to the data.

If you don’t have an FTP client you can also do this using the File Manager available in your hosting control panel.

Re-installing the theme is nothing complicated it is same as deleting a folder on your desktop and re-creating a new one 🙂 Just access WordPress directory on your server and go to folder “wp-content/themes” delete “enfold” folder and upload the fresh copy of the theme files downloaded from ThemeForest.

Install via cPanel

Uploading the theme files using the File Manager in your hosting account is very easy. In most cases it will be similar to the below steps. However, depending on your hosting plan the steps may differ but it’s easy to find out how to use the File Manager by searching the hosting company knowledge base 🙂

  •  Login to your hosting account and access the File Manager ( In most cases it’s found under Quick Links or the Files section).
  • Open File Manager and browse to the wordpress folder usually the wordpress files are installed in the root directory of your site.
  • Uploaded the latest version of the theme files to wp-content/themes/enfold (some hosting companies may not support uploading zip files and extraction using the File Manager tool).
  • Activate Enfold theme from Appearance > Themes page in WordPress dashboard.

Related Topics

  • Install a child theme
  • Migrating WordPress from a local Installation to a live server

Troubleshoot

Missing style sheet error

A common issue that can occur with users new to installing WordPress themes is a “Broken theme and/or stylesheets missing” error message being displayed when trying to upload or activate the theme. This error message does not mean that the theme you have purchased is broken. If you are getting the no style.css message it means you aren’t actually uploading the actual theme file.

When you download the theme files from themeforest you can either download:

  • All files (with documentation, psd files, wordpress theme, licence, versions file etc).
  • Only the theme files.

If you download only the theme files and upload them to your server the theme will work fine. If you download “All files” you need to unpack the downloaded zip file first. Inside you will find another ZIP file that contains the actual theme files. This is the folder you can upload to your server.

If you need more information about this topic. Here is a video tutorial by themeforest .

Backup WordPress Site

$
0
0

WordPress Site Backup

Overview

Taking timely backups of your WordPress site help you to save time and secure your data. We will show you a few ways to take backup of your WordPress site.

Backup WordPress using Plugins

If you are installing a theme, plug-in or modifying any files belonging to your existing website on which you have invested time, money and effort. It’s important to back up your website and save yourself the effort of setting up the site again from scratch if anything goes wrong.

The WordPress Codex has useful info about WordPress site backups.

Some plugins make it easy to take backups:

How to use Enfold with import/export Plugins

Enfold uses custom fields (post meta data) to store the template builder data. Thus you must be careful if you want to export/import pages with plugins like WP Import/Export All because by default the plugins will not export/import custom fields. However it’s really easy to add these fields to the export/import file. If you’re using WP Import/Export All go to “All Export > New Export” on the wordpress admin page and select the post type you would like to export (i.e. “Pages”). Then click “Continue to Step 2”. On the next page you’ll notice the “Available Data” column on the right side. It contains three tabs (“Standard” for standard data, “Custom Fields” for post meta data and “Other” for other data fields).

If you want to be on the safe side we recommend to select the “All Standard”, “All Custom Fields” and “All Other” cards from the tabs and to drag’n’drop these cards to the left area. Then you can be sure that the required data will be exported. If you don’t want to export all fields (i.e. because of the size of the database) then you must at least select following fields – otherwise the template builder won’t work properly after the import: “<_aviaLayoutBuilder_active>”, “<_aviaLayoutBuilderCleanData>”, “<_avia_builder_shortcode_tree>”, “<_thumbnail_id>”, “”, “”, “

”, “”, “” and “
.
Note: In some cases (i.e. if you’re using complex template builder layouts) you need to export additional fields – we recommend to search for all custom fields which contain the prefix “_avia” – these fields are always required.After you added all required fields to the left area click on “Continue to Step 3” and then click the green “Confirm & Run Export” button. After the export process has finished click on the “Bundle” button to download the export files. The “Bundle” also contains a configuration file which automatically configures the import script if you want to import the data on another website/server.

To import the “Bundle” go to “All Import” > “New Import” on the wordpress admin page and click on the “Upload a file” button. The “Bundle” configuration file will automatically select the right post type for you and you just need to click on the “Continue to Step 2” button. You can ignore the next settings page and click on the “Continue to Step 3” button. On the next page you’ll notice that the “Custom Fields” tab at the bottom is already configured and contains the custom fields you exported before. Check if necessary fields are configured, then click on “Continue to Step 4”. On the next page click on “Continue”, then “Confirm & Run Import” and the import process will start.

That’s it – you have successfully exported/imported your entries including the Enfold template builder data.

Backup custom post types

$
0
0

How to Import/Export custom post types

Overview

Enfold uses custom fields to store the template builder data. it’s really easy to add these fields to the export/import file using a plugin like WP Import/Export All

Export

  • Go to All Export > New Export on the admin page and select the post type you would like to export (i.e. “Pages”).
  • Click “Customize Export File”
  • On the next page select “All Custom Fields” and “All Other” cards from the tabs and to drag and drop these cards to the left area. ( Because by default the plugins will not export/import custom fields ).
  • After you added all required fields to the left area click on “Continue” and then click “Confirm & Run Export” button.
  • Once the export process finishes click the “Bundle” to download the export files.
  • The “Bundle” also contains a configuration file which automatically configures the import script if you want to import the data on another website/server.

Import

  • To import the “Bundle” go to “All Import” > “New Import” on the WordPress admin page.
  • Select the “Upload a file” button. The “Bundle” configuration file will automatically select the right post type for you and you just need to click on the “Continue to Step 2” button.
  • You can ignore the next settings page and click on the “Continue to Step 3” button.
  • On the next page, you’ll notice that the “Custom Fields” tab at the bottom is already configured and contains the custom fields you exported before.
  • Check if necessary fields are configured, then click on “Continue to Step 4”.
  • On the next page click on “Continue”, then “Confirm & Run Import” and the import process will start.

That’s it – you successfully exported/imported your entries including the Enfold template builder data.

Backup theme settings

$
0
0

Backup Theme Settings

Overview

We will show you how to back up your theme settings and import it whenever necessary.

Import/Export theme settings

You may have spent some time customising and styling the theme elements like header style, colors, content style, fonts and many other options. Enfold theme options can be exported or imported very easily from the Import/Export tab.

Export/Backup Settings: Go to Enfold > Import/Export tab.

Note: After importing the theme settings file, to see the changes, please make a small change in the theme options by changing the font size or color and save the settings.

Import/Export Theme settings to child theme

If your site was running on Enfold theme without a child theme and at some point, down the line, you decide to add some modifications and wish to install a Child theme, it is very easy to import the main theme settings without having to redo all the changes again.

Go to Enfold > Import/Export > Import Parent Theme Settings.


Install WordPress on localhost

$
0
0

How to install WordPress on localhost?

Overview

There are multiple ways to set up a WordPress development environment and automate the repeating tasks which will save you a lot of time and effort in the long run. For example, to set up a WordPress site typically the below steps have to be performed:

  • Download the WordPress files.
  • Extract and copy it to the server.
  • Access PHPMyAdmin and create a new database with proper user privilege.
  • Rename wp-config-sample.php to wp-config.php and add the database info.
  • Finally, go through the installing process of the WordPress site.

In this section, we will learn to install a WordPress site on your local computer using Bitnami WordPress. This method does not require you to follow the traditional steps mentioned above instead we can get the WordPress site up and running in just a few clicks or with a single command line.

There are more ways to automate everything like using Grunt etc, but for now, we will just use this simple and effective approach which is easy to learn and it makes your work less repetitive to set up WordPress sites for your new projects.

What is a localhost?

Localhost is usually referred to a computer on which you can install a web server like XAMP, WAMP, Local by Flywheel or many another server modules available on the internet to run a website on a local IP that is visible only to you.

Here are a few reasons to consider developing your site on a local machine first:

  • Faster development: Website development requires going back and forth. Adding or deleting the content can be time-consuming on a live server. Saving your changes and viewing them is much faster on a local system.
  • Risk-free website testing: Every time a new plugin or a custom code is installed on your WordPress site, you risk crashing the entire web site if the plugin or the code is not compatible. A local host is a good place to test the functionality of a plugin or custom code Avoid the risk of crashing the live site for everyone. If a localhost site crash, it is only for you and it is easy to restore the localhost site by removing the code or deleting the plugin folder.
  • Risk-free content update: Many of us have faced this situation where you finished typing a long email or a post and you press the “Submit” button only to see an ugly error message “Page cannot be displayed” and you lose all the unsaved content when you hit that back button. Your local host site does not require internet to save change hence chances of losing the data because of poor internet connection is highly unlikely.
  • It is completely free: Normally, for a website to function you need a domain name and hosting server. No need to buy a domain name or hosting space to work locally. It is completely free to install and run the localhost server on your computer.
  • Easy to set up and migrate: You can churn up a working WordPress website in just a few clicks. If you are happy with the way your site looks on your local system it is easy to migrate the entire site to a live server.

Limitations:

  • Only you can view the site and it is not easy to share or grant access to other developers. (Local by Flywheel has a workaround for this by providing a link to share with other users on the internet).
  • Limited support for WordPress multisite development.
  • Sometimes the live server environment may be different from the localhost server.
  • Emails do not work out of the box until you Configure SMTP for outbound emails.

How to install a localhost server?

Things you should know before installing:

  • The server automatically starts when you log in to your computer.
  • Your WordPress files can be located in “bitnami-application\apps\SITE-NAME”.
  •  Multiple WordPress sites can be installed using the Bitnami WordPress stack module.
  • When you download and run the Bitnami installer change the default application folder path from “C:\Bitnami\wordpress-VERSION” to “D:\ANY-FOLDER”. I personally prefer to install the application in any other driver than the one that contains the operating system this way if anything happens to the operating system and if I have to format the Drive C: my project folders in D: Drive will be unaffected.
  • Setup automatic backup for your project files and folder by using the Google Backup and Sync program.

OK! Let’s get started and install the program:

  • Download Bitnami WordPress.
  • Double click the installer and follow the step by step on-screen instructions to complete the installation.
  • During the installation process, the setup will ask you to enter the site name, email, username and password. Note : Passwords for phpMyAdmin and MySQL will be the same.

NOTE: Bitnami automatically creates a database with the same name as the site name you provide during the installation and links it to your WordPress site.

For detailed instructions with pictures of the entire installation process please check the Bitnami Documentation.

How to install a WordPress site on your localhost?

The steps involved in creating a separate WordPress site on the localhost depends on which program you are using. If you are using XAMP then you have to follow the traditions steps mentioned in the very beginning of this post.

In order to avoid the painful and repeating steps of manually creating the database and linking it in the wp-config.php file we chose a more modern yet simple approach and went ahead with Bitnami. By default, Bitnami will install one instance of WordPress when you run the installer. To add more WordPress sites with a separate database go ahead and

    • Download the Bitnami WordPress Stack Module.
    • Just to make typing the file name a bit easier in the command prompt. Rename the downloaded file name from “bitnami-wordpress-VERSION-module-windows-x64-installer.exe” to  “installer.exe” and place it in C: Drive.
    • Open the list of programs installed on your computer and click on “Use Bitnami WordPress Stack” this should open the command prompt for you.
    • Copy and paste the below line in the command prompt and hit the enter key.
      C:installer.exe --wordpress_instance_name NEW_BLOG_NAME
      

The installer will open, follow the onscreen instructions to go ahead and install a separate WordPress site. If everything goes fine you should see the new site in “bitnami-application\apps\SITE-NAME” Next let’s see how to access the newly installed site 🙂

How to access your website frontend on localhost?

After successfully installing the WordPress site it’s now time to access the frontend to see how things look. If you have installed the Bitnami WordPress then the server will automatically start when the computer starts.  Open your favourite web browser and type the address http://ocalhost/YOUR_SITE_NAME in the address bar. Make sure to replace “YOUR_SITE_NAME” with the website name you provided during the installation process.

How to access WordPress admin area?

Let the fun begin!! We can login to the WordPress admin area and change the way our web site looks. To access the WordPress admin area keep your credentials handy and type the address http://localhost/YOUR_SITE_NAME/wp-admin in the address bar of your favourite web browser. Make sure to replace “YOUR_SITE_NAME” with the website name you provided during the installation process.

How to access phpMyadmin?

When you add any content to your sites such as a post, page, images etc, or change any settings it is stored in the database. Not to be confused with the enfold theme files which you download from ThemeForest and upload to the WordPress site. Theme files are stored on the server and not in the database. The database can be modified, exported or imported from the phpMyAdmin area.

To access the phpMyAdmin area and make changes to your database the default username is “root” and the password is the same as the one you gave during the Bitnami WordPress set up. Login to the phpMyAdmin area by typing the address http://localhost/phpmyadmin/ in the address bar of your favourite web browser.

Privacy & Cookies

$
0
0

Privacy and cookies

Overview

According to the Wikipedia privacy policy is a statement or a legal document (in privacy law) that discloses some or all of the ways a party gathers, uses, discloses, and manages a customer or client’s data. It fulfills a legal requirement to protect a customer or client’s privacy.

on May 25, 2018 the General Data Protection Regulation (GDPR) came into force. Under the GDPR act EU citizens got the power to control the personal information they wish to share online. To know more on how Enfold theme is GDPR Compliant please check the GDPR blog post.

GDPR Settings

Enfold theme is GDPR ready! To access the GDPR Settings go to Enfold > Privacy and Cookies. Here you can change the settings for the following:

  • Comment form
  • Contact forms
  • MailChimp contact forms
  • Login forms
  • Registration forms

How to enable cookie consent message bar?

A cookie consent message bar appears at the bottom of the page and displays a message to the web site user about the cookies.

To enable the cookie consent message bar please go to Enfold > Privacy and Cookies

How to enable cookie consent modal window?

Did you know that you can link the GDPR modal window to a custom button? You can then display the GDPR button anywhere on the site using a shortcode. Here the users can enable and disable any of the GDPR options as seen in the below screenshot.

You need to download and install the Enfold Privacy Addon plugin. After the plugin is activated you will notice the extra options at the bottom of the Privacy and Cookies tab in Enfold theme options. 

Here go ahead and check the options “Activate the shortcode” before saving your settings.

Lastly, just copy the shortcode provided here to your page or post where you want to display a button that opens the GDPR options in a modal window.

Can users update the cookie settings after clicking the OK button on the cookie message bar?

Google Analytics

$
0
0

Google Analytics

Overview

Google Analytics can track almost everything on your site and give you an insight into page views, search terms, user navigation and much more. Using the analytics data we can improve the site performance.

You will learn how to add Google Analytics to Enfold theme using a few different methods:

  • Add Google Analytics to Enfold theme using the built-in theme options.
  • How to manually add the Google Analytics tracking code to your Enfold theme.
  • How to use a Google Analytics WordPress plugin.
  • Enable Google Analytics on your site using the Google Tag Manager.

Creating a Google Analytics Account

We assume that you already have an account set up with Google Analytics. If not don’t worry, getting started with Google Analytics is not as complicated as it looks. We won’t go in full detail to create the account but here is the basic steps you need to perform:

First, signup for a free Google Analytics account.

In this step, let’s create a new “Property” so we can add our site to this Property and manage it easily in the future.

  • Click on the Admin option at the bottom left
  • Look for the “Create Property” button and click on it to proceed.

  • In this screen select the “Web” property and continue. Please note that “Apps and Web” is still a BETA version and may not work properly.

  • In the final step of creating a property, you will be prompted to enter the website details of which you want to track using google analytics. Enter the details and click on the “Create” button at the bottom.

After creating the analytics property, we are just one step away from tracking your website. We need to now copy the required analytics code and install it on our website to start tracking 🙂

To copy the analytics code click on the Admin menu and select “Tracking Code” under Tracking Info.

Set up Google Analytics

Enable Google Analytics from the theme options

Google Analytics can be enabled from Enfold Theme Options > Google Services > Google Analytics > Google Analytics Tracking Code.

Manually add tracking code

To verify your site and enable Google search console in your Google Webmaster tool, it needs to be in a specific format and this can be achieved by adding the Analytics code manually to your child theme functions.php file.

//——————————-
// Custom script in the head section
//——————————-

function gtag_script(){
?>


Use a plugin to insert the code.

[/av_textblock]

Another prefered method to install Google Analytics on WordPress sites is by using a plugin. Not only it is easy to use but also provides additionsl features to easily view your stats. Browse through some of the Google Analytics Plugins on the WordPress plugins directory. We simply cannot test all the plugins and recommend which ones to use. Most of the plugins should work fine with Enfold without any issue. Go ahead and give it a try!

Instagram

$
0
0

Instagram

Overview

You can display your Instagram feed anywhere on your page using Enfold’s Instagram widgets.

There are currently three options to display your Instagram feed:

1- Default Enfold Instagram Widget

2- Plugin addition Enfold Instagram (Smash Balloon) Widget

3- Plugin addition Instagram Feed (Smash Balloon) element

For quick setup, we would recommend default Enfold Instagram widget however if you would like to have more advanced options or having issues displaying your feed in default widget, we would recommend using Smash Balloon widget or element.

Enfold Instagram Widget

Enfold’s Instagram widget is the simplest way to display your feed. You can simply add Enfold Instagram Widget to any of your widget areas and insert your username, adjust couple of options such as column and item count and you are set!

Due to limitations of Instagram API on shared servers, you might receive “Instagram has returned invalid data” error when using default Instagram widget. If that happens to be the case, please use Smash Balloon instead.

Enfold Instagram (Smash Balloon) Widget and Element

Smash Balloon Social Photo Feed is the most advanced and popular Instagram feed plugin. Setting it up is easy and also there are no limitations since you are going to be authorizing your account. In version 4.7.4, we have implemented both free and pro versions of Smash Balloon Social Photo Feed plugin in Enfold.

First of all, you are going to need to setup Instagram Feed plugin. To do so, please refer to following links for both free and paid versions:

Setting up the Free Instagram Feed WordPress Plugin

Setting up the Instagram Feed Pro WordPress Plugin

Displaying your feed

After setting up the plugin, you can go ahead and use new widget called Enfold Instagram (Smash Balloon) in Appearance > Widgets and Instagram Feed element in Plugin Additions tab of Advanced Layout Builder.

Custom Element Templates

$
0
0

Custom Element Templates

Basics

Google Analytics can track almost everything on your site and give you an insight into page views, search terms, user navigation and much more. Using the analytics data we can improve the site performance.

You will learn how to add Google Analytics to Enfold theme using a few different methods:

  • Add Google Analytics to Enfold theme using the built-in theme options.
  • How to manually add the Google Analytics tracking code to your Enfold theme.
  • How to use a Google Analytics WordPress plugin.
  • Enable Google Analytics on your site using the Google Tag Manager.

Creating a Google Analytics Account

We assume that you already have an account set up with Google Analytics. If not don’t worry, getting started with Google Analytics is not as complicated as it looks. We won’t go in full detail to create the account but here is the basic steps you need to perform:

First, signup for a free Google Analytics account.

In this step, let’s create a new “Property” so we can add our site to this Property and manage it easily in the future.

  • Click on the Admin option at the bottom left
  • Look for the “Create Property” button and click on it to proceed.

  • In this screen select the “Web” property and continue. Please note that “Apps and Web” is still a BETA version and may not work properly.

  • In the final step of creating a property, you will be prompted to enter the website details of which you want to track using google analytics. Enter the details and click on the “Create” button at the bottom.

After creating the analytics property, we are just one step away from tracking your website. We need to now copy the required analytics code and install it on our website to start tracking 🙂

To copy the analytics code click on the Admin menu and select “Tracking Code” under Tracking Info.

Set up Google Analytics

Enable Google Analytics from the theme options

Google Analytics can be enabled from Enfold Theme Options > Google Services > Google Analytics > Google Analytics Tracking Code.

Manually add tracking code

To verify your site and enable Google search console in your Google Webmaster tool, it needs to be in a specific format and this can be achieved by adding the Analytics code manually to your child theme functions.php file.


//——————————-
// Custom script in the head section
//——————————-

function gtag_script(){
?>


Use a plugin to insert the code.

[/av_textblock]

Another prefered method to install Google Analytics on WordPress sites is by using a plugin. Not only it is easy to use but also provides additionsl features to easily view your stats. Browse through some of the Google Analytics Plugins on the WordPress plugins directory. We simply cannot test all the plugins and recommend which ones to use. Most of the plugins should work fine with Enfold without any issue. Go ahead and give it a try!

Recommended Plugins

Google Site Kit

OpenStreetMaps – Leaflet Maps

$
0
0

OpenStreetMaps – Leaflet Map

Overview

In Enfold version 4.8.2 we have added OpenStreetMaps – Leaflet map element. OpenStreetMaps is an open source and responsive map with markers and it is based on Leaflet Map plugin. Unlike Google Maps, you do not need a key or  an account to use OpenStreetMaps.

How to active OSM – Leaflet Map element

Here are the steps to active OSM – Leaflet Map element

  • In your WordPress dashboard, go to Plugins > Add New and install Leaflet Map plugin
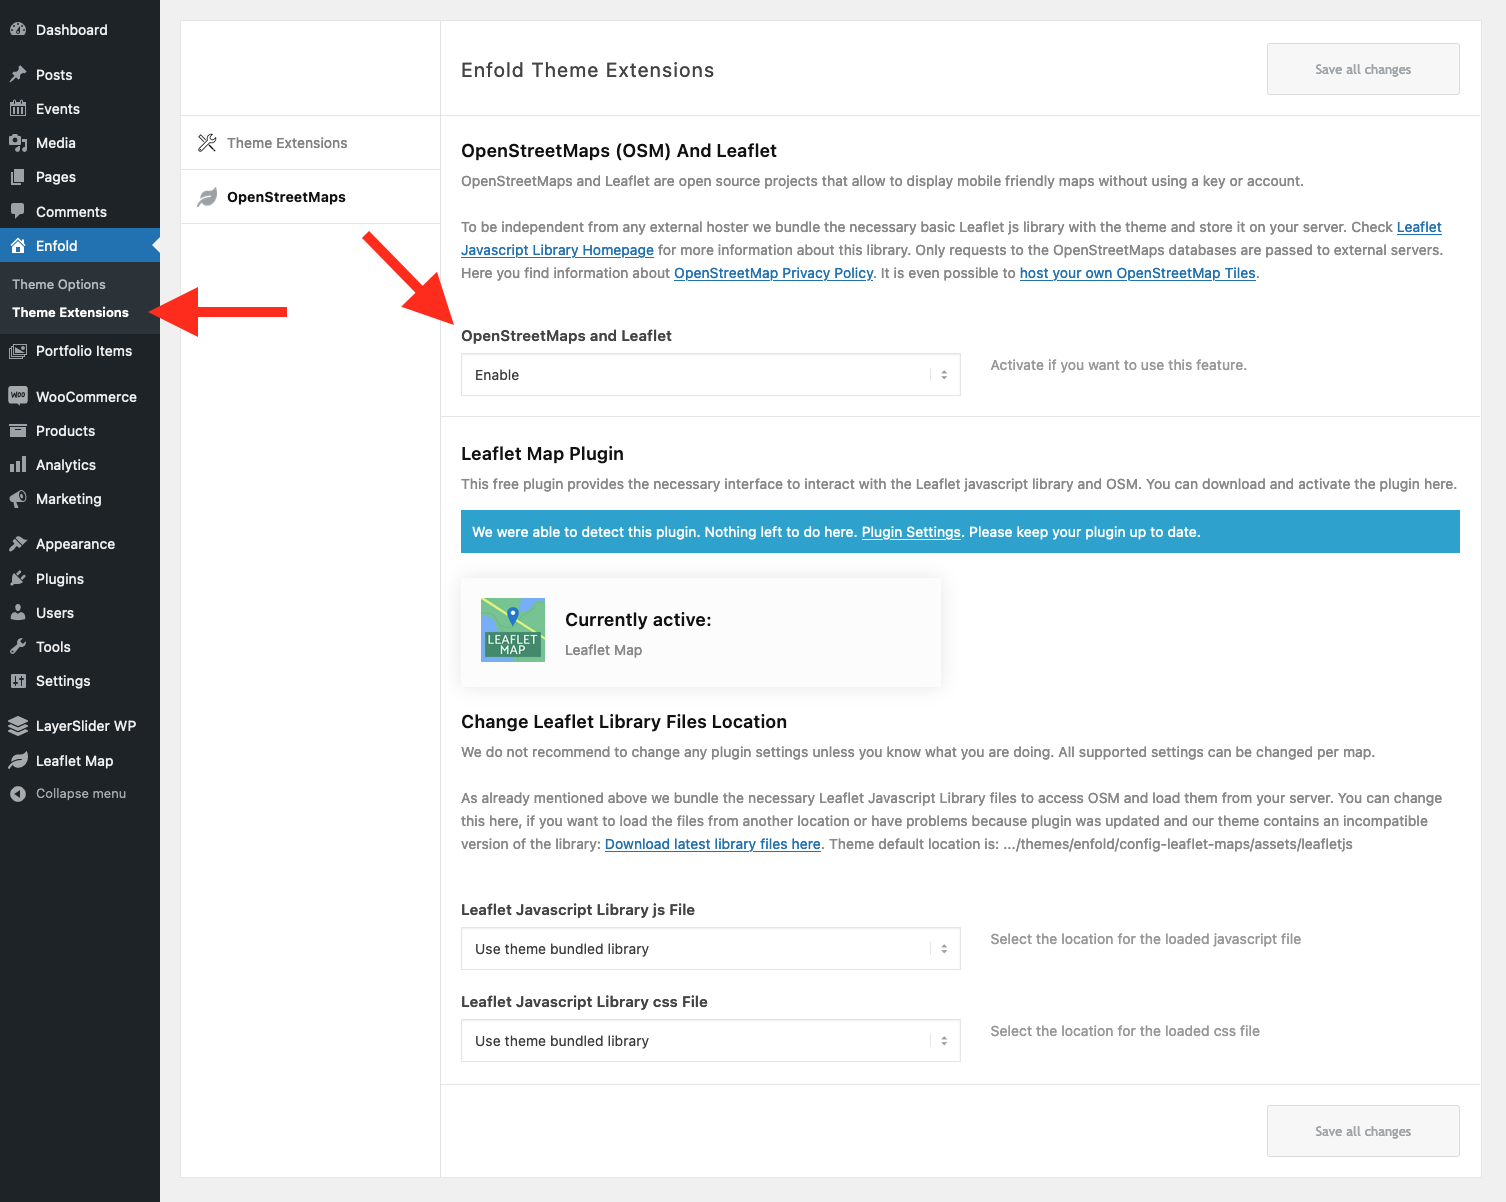
  • Go to Enfold > Theme Extensions > OpenStreetMaps and enable it.

enabling OpenStreetMaps

Troubleshoot

Maps do not show

This is probably caused by Leaflet js library that was bundled in the theme is incompatible with the version required by the plugin.

To troubleshoot:

  • Go to Enfold > Theme Extensions > OpenStreetMaps and switch “Leaflet Javascript Library js File” option to “Use Plugin Default Library” until next theme update

or

Accessibility

$
0
0

Accessibility

Overview

Enfold is compatible with One Click Accessibility and WP Accessibility plugins to help you make your website more accessible.

You can install one of the plugins and choose Accessibility Conformance Level in Enfold > Theme Extensions > Accessibility tab.

Please note that neither Enfold nor the compatible plugins do not guarantee to fulfil any legal rules for accessibility.


Icon Circles

$
0
0

Icon Circles

Overview

Added in Enfold 5.1, Icon Circles element is the perfect element if you would like to keep your page minimalistic and to offer your content in a creative way.

Just like the other ALB elements, Icon Circles comes with variable styling options such as adding links to icons, choosing first active icon, color options and even the rotation of icons!

You can add as many icons as you like in your Icon Circles element however we recommend adding between 3 to 12 icons for the best presentation.

Icon Circles example

Lorem Ipsum

Lorem ipsum dolor sit amet, consectetur adipiscing elit. Etiam varius, ligula sit amet scelerisque dictum, ligula augue dictum odio, non fringilla leo turpis id massa. Aenean finibus lectus nec arcu porttitor molestie.

Donec tempor

Donec tempor lectus vel suscipit maximus. Duis non dolor viverra, malesuada dolor ac, volutpat sapien. Morbi fermentum sollicitudin velit vitae mollis. Curabitur fringilla pulvinar magna, sed convallis lorem facilisis in.

Curabitur fringilla

Curabitur fringilla pulvinar magna, sed convallis lorem facilisis in. Aenean congue libero eros, a vulputate orci egestas ut. Mauris commodo nisi ut neque sagittis interdum. Nam ut dolor vitae sem lobortis lacinia.

Morbi in mauris

Morbi in mauris quis dolor placerat ullamcorper. Orci varius natoque penatibus et magnis dis parturient montes, nascetur ridiculus mus. Suspendisse aliquam orci vel consectetur faucibus.

Ut tellus dui

Ut tellus dui, varius egestas tellus ut, scelerisque pharetra justo. Cras venenatis pretium nisi, sit amet fermentum dui dictum a. Maecenas auctor nisi auctor egestas luctus. Donec rutrum nibh ac quam ultricies gravida.

Vestibulum accumsan

Vestibulum accumsan in nisi eu convallis. Morbi libero magna, ornare vitae ex vel, porta viverra est. Class aptent taciti sociosqu ad litora torquent per conubia nostra, per inceptos himenaeos.

Shortcode

Chart Element

$
0
0

Chart Element

Overview

Added in Enfold 5.3, the Chart element is an easy way to display static data to your site visitors in a graphic manner.

The element is based on Chart JS and the necessary js file is bundled. So there is no access to any external resource.

In the following sections we will describe how you can turn this element to display data that is created dynamically during runtime. You have to exclude the page containing this element from caching as the necessary data is rendered in HTML. Depending on the data you want to show  you can also invalidate a cached page on an hourly/daily/weekly/… basis only.

Add Dynamic Data Support

The following steps provide an overview but assume you have skills in php, WordPress and know how filters are working. You can find the code snippets in our Library

  • We recommend that you use a child theme
  • To keep your code seperate from other changes you make to functions.php of the child theme create an own file in the folder (or in a subfolder where you can also place files you need to connect to your data provider)
  • Lets say we create  /charts/my_chart_data.php
  • Inside the file my_chart_data.php add the code to connect to your data provider
  • And the code we provide later to add the new data to the chart

To activate your code you have to include the following in functions.php of the child theme:

require_once 'charts/my_chart_data.php';

To easily identify a chart on your site we recommend to add a unique id for each chart in Advanced -> Developer Settings -> Custom ID Attribute (e.g. my-chart-1, my-chart-2, ….). Create your chart and setup your datasets, datapoints, … as if it it would be a static data chart. This will be the base to replace the static data with your dynamic data later.

Update ‘Dataset Datapoints‘ of a dataset

A datapoint is a single numeric value (integer, float) except for:

  • Bubble Chart: x;y;r where x,y,r is numeric
  • Scatter Chart: x;y where x,y is numeric

The new datapoints are placed in an array:

$dp = array( 5, 20, 45 );

or e.g. for a bubble chart:

$dp = array( '5;3;2', '20;15;4', '45;25;3' );

The following snippet will inject the dynamic dataset points:


/**
 * Filter dataset datapoints and replace with dynamic datapoints.
 * Is called in a loop for every dataset defined in the ALB element.
 *
 * @since 5.3
 * @param array $data			data for dataset provided by ALB Element
 * @param int $index			0 based index of dataset
 * @param array $attr			shortcode attributes array
 * @return array
 */
function my_chart_dataset_data_points( $data, $index, $attr )
{
	//	check if this is a chart to modify (we check only for id="my-chart-1", but any extended logic can be used)
	$id = $attr['id'];

	if( $id != 'my-chart-1' )
	{
		//	return unmodified data
		return $data;
	}

	/**
	 * your_provider_dataset_data_points is a function that connects to your data provider for dataset $index,
	 * places the datapoints in an array and returns it.
	 */
	$data_array = your_provider_dataset_data_points( $index );

	return $data_array;
}

add_filter( 'avf_chart_dataset_data', 'my_chart_dataset_data_points', 10, 3 );

Update ‘Dataset Label‘ of a dataset

The Dataset Label is displayed above the chart and on hover in the tooltip box.

The following snippet will inject the dynamic Dataset Label:


/**
 * Filter dataset label and replace with dynamic label.
 * Is called in a loop for every dataset defined in the ALB element.
 *
 * @since 5.3
 * @param string $dataset_label
 * @param int $index			0 based index of dataset
 * @param array $attr			shortcode attributes array
 * @return string
 */
function my_chart_dataset_label( $dataset_label, $index, $attr )
{
	//	check if this is a chart to modify (we check only for id="my-chart-1", but any extended logic can be used)
	$id = $attr['id'];

	if( $id != 'my-chart-1' )
	{
		//	return unmodified data
		return $dataset_label;
	}

	/**
	 * your_provider_dataset_data_label is a function that connects to your data provider for dataset $index,
	 * gets the label for the dataset and returns it.
	 */
	$label = your_provider_dataset_data_label( $index );

	return $label;
}

add_filter( 'avf_chart_dataset_label', 'my_chart_dataset_label', 10, 3 );

Update X-Axis Labels

The following snippet will inject the dynamic X-Axis Labels:


/**
 * Filter the x-axis labels and replace with dynamic labels.
 *
 * @since 5.3
 * @param array $chart_labels
 * @param array $attr			shortcode attributes array
 * @return array
 */
function my_x_axis_chart_labels( $chart_labels, $attr )
{
	//	check if this is a chart to modify (we check only for id="my-chart-1", but any extended logic can be used)
	$id = $attr['id'];

	if( $id != 'my-chart-1' )
	{
		//	return unmodified data
		return $chart_labels;
	}

	/**
	 * your_provider_chart_x_axis_labels is a function that connects to your data provider,
	 * gets the x-axis labels and returns them in an array.
	 *
	 * e.g.:   array( 'Point1', 'Point2', 'Point3' )
	 */
	$labels = your_provider_chart_x_axis_labels( $attr );

	return $labels;
}

add_filter( 'avf_chart_labels', 'my_x_axis_chart_labels', 10, 2 );

Add More Options – Customize Chart

The chart library provides a lot of more styling and layout features (Chart JS ). You can modify anything you like with a filter.

Our element builds the js config option in php and renders it to the frontend as a json string in a HTML data attribute (data-chart_config) which is passed 1:1 to the js chart object. Be careful not to break anything – there is no further check on the returned object.

To implement a js object

 {} 

use

new stdClass(); 

To implement a js array

 [] 

use

array(); 

This is the filter which is called right before the php object is converted to json:


/**
 * Filter the complete config array for the chart. See https://www.chartjs.org/docs/latest/. Make sure not to break the structure.
 * Use \stdClass for js {} and array for js [].
 *
 * @since 5.3
 * @param \stdClass $config
 * @param array $attr
 * @param array $meta
 * @return \stdClass
 */
function my_chartjs_config_object( $config, $attr, $meta )
{
	//	check if this is a chart to modify (we check only for id="my-chart-1", but any extended logic can be used)
	$id = $attr['id'];

	if( $id != 'my-chart-1' )
	{
		//	return unmodified data
		return $config;
	}

	//	add your custom settings in your function my_chart_modify_config
	$new_config = my_chart_modify_config( $config, $attr, $meta );

	return $new_config;
}

add_filter( 'avf_chartjs_config_object', 'my_chartjs_config_object', 10, 3 );

Custom Layout and Dynamic Content

$
0
0

Custom Layout and Dynamic Content

Overview

“Dynamic Content” allows to add post data (like ID, title, …), post metadata links (like Categories/Terms, Tags) and custom fields data to ALB elements or tinyMCE content.

“Custom Page Layout” allows to create layout sections for posts of any post type, also for custom post types (e.g. product when using WooCommerce). The post type must support our ALB and posts must use our ALB to add these sections with the ALB element “Custom Page Layout”. Changes made to a “Custom Page Layout” are visible in all posts that use this layout.

“Dynamic Content” fields in the “Custom Page Layout” element pull the content from the post where the ALB “Custom Page Layout” element is added.

It is possible to use multiple ALB “Custom Page Layout” elements in one post, but it is not possible to use a ALB “Custom Page Layout” element in a “Custom Page Layout” post.

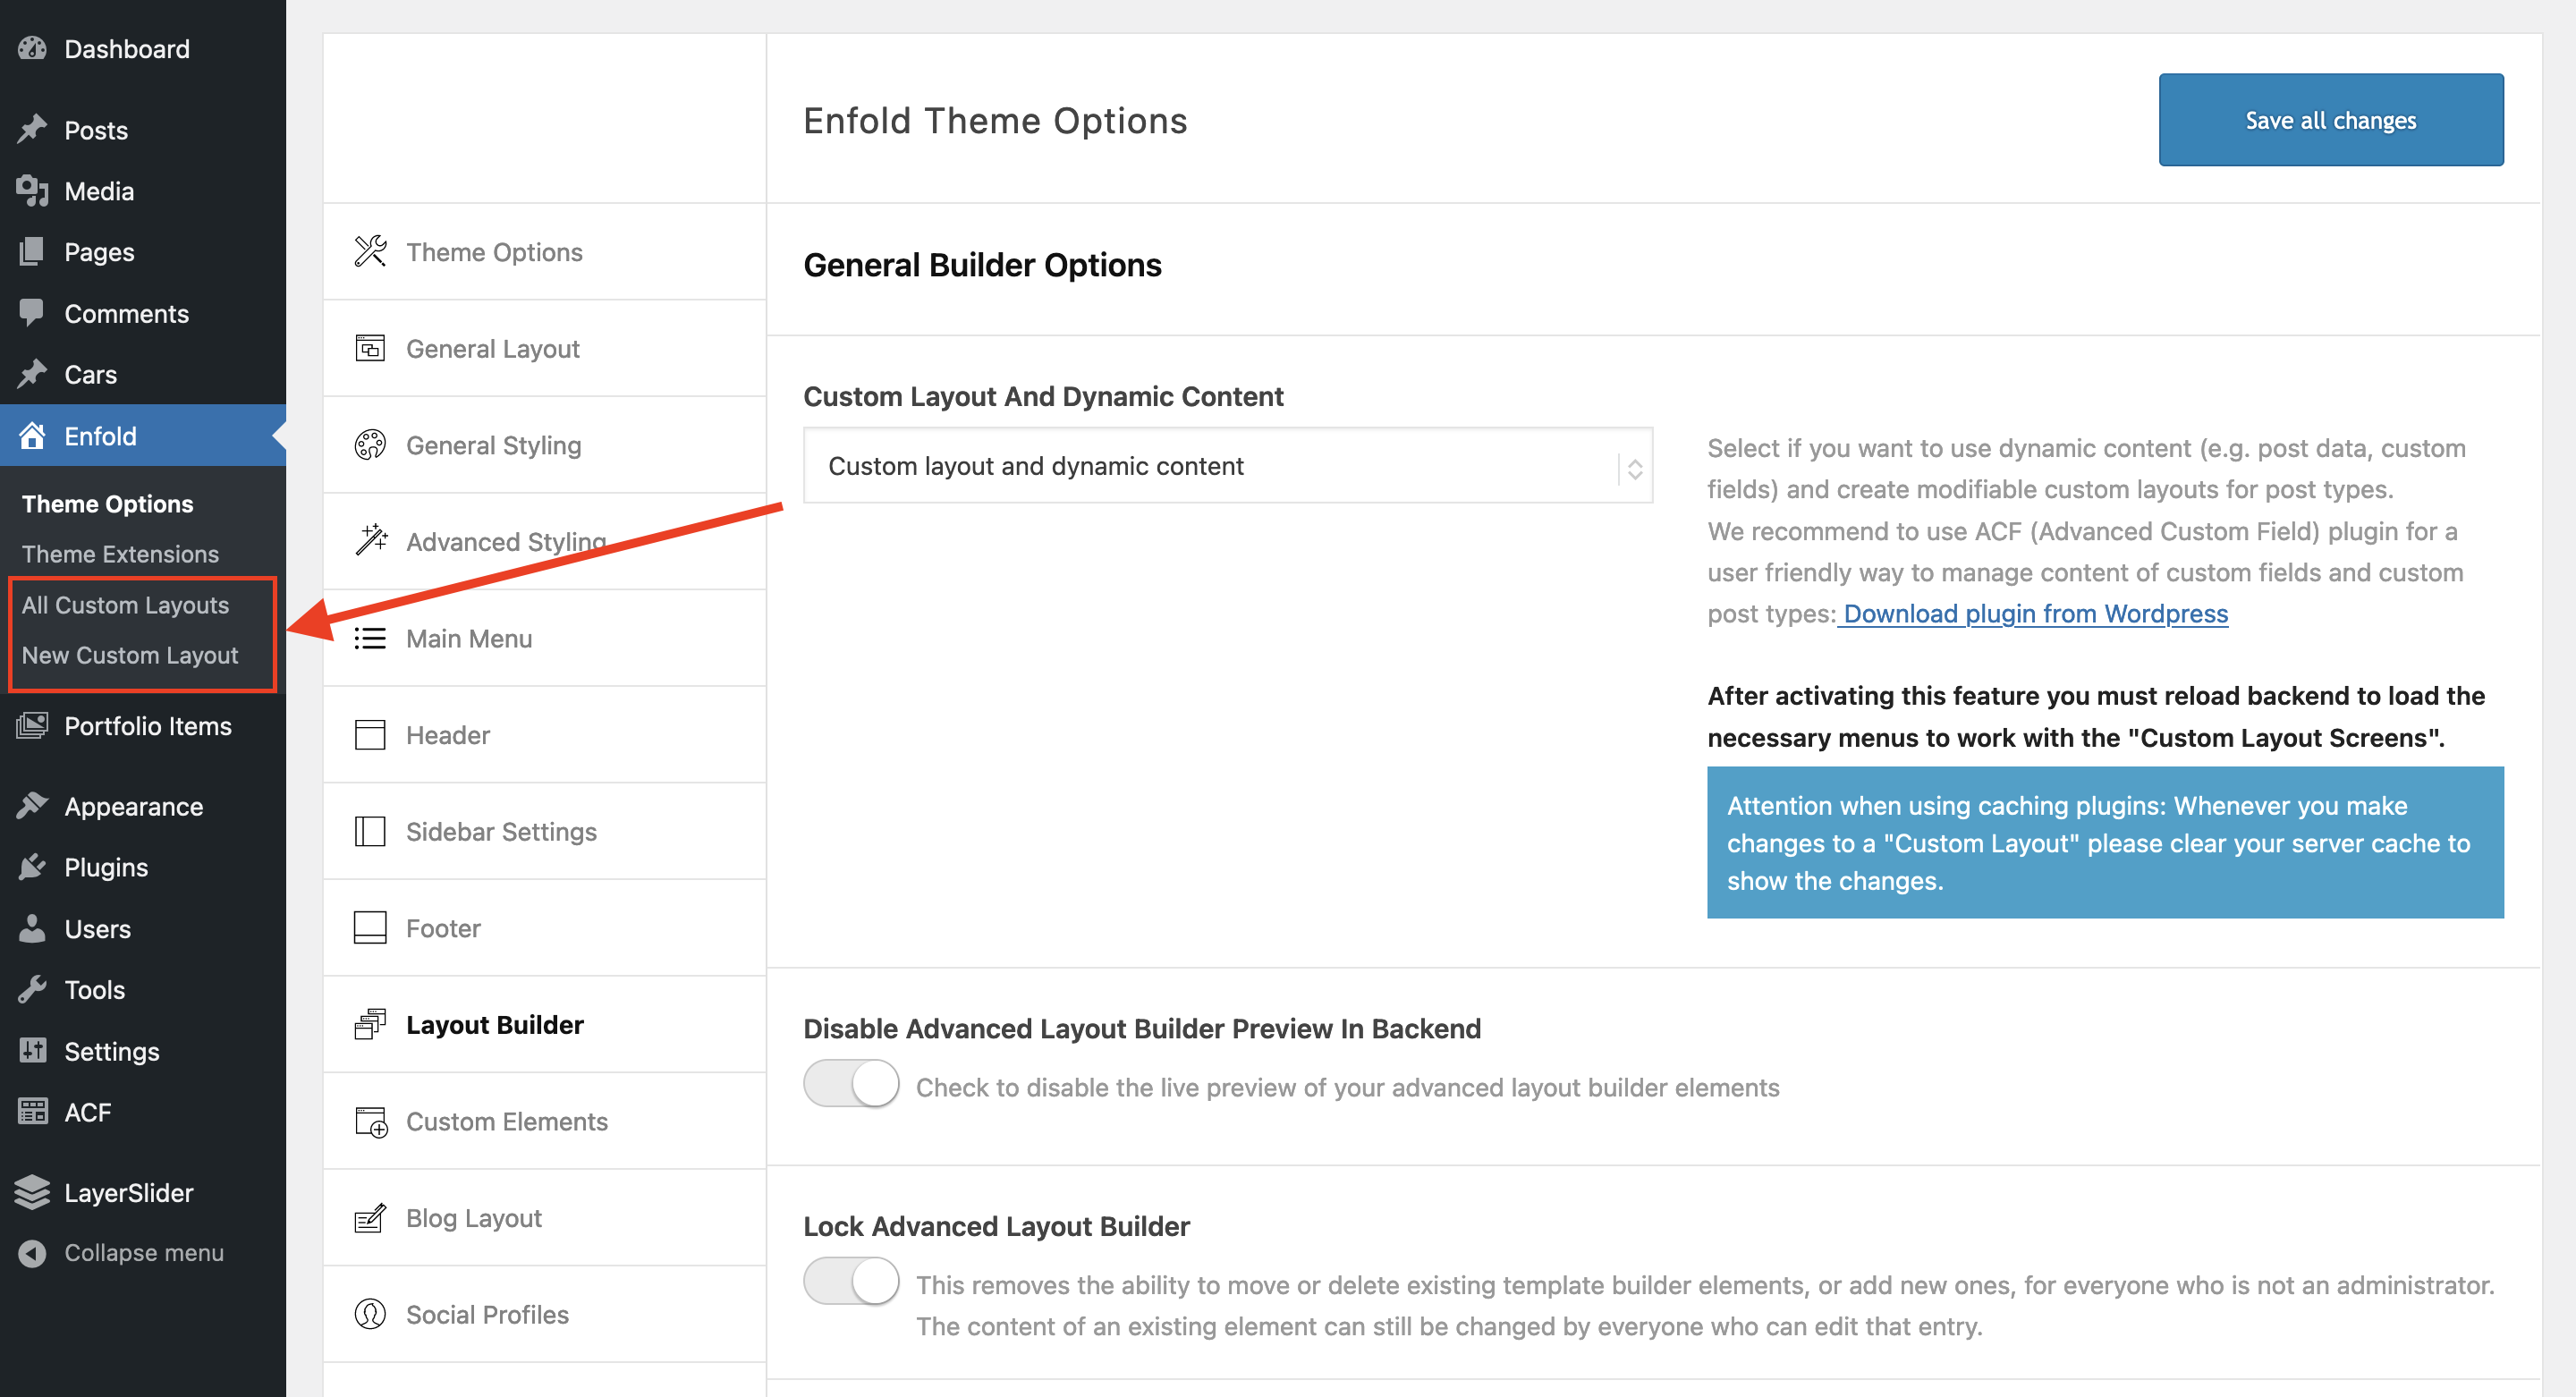
To activate this feature:

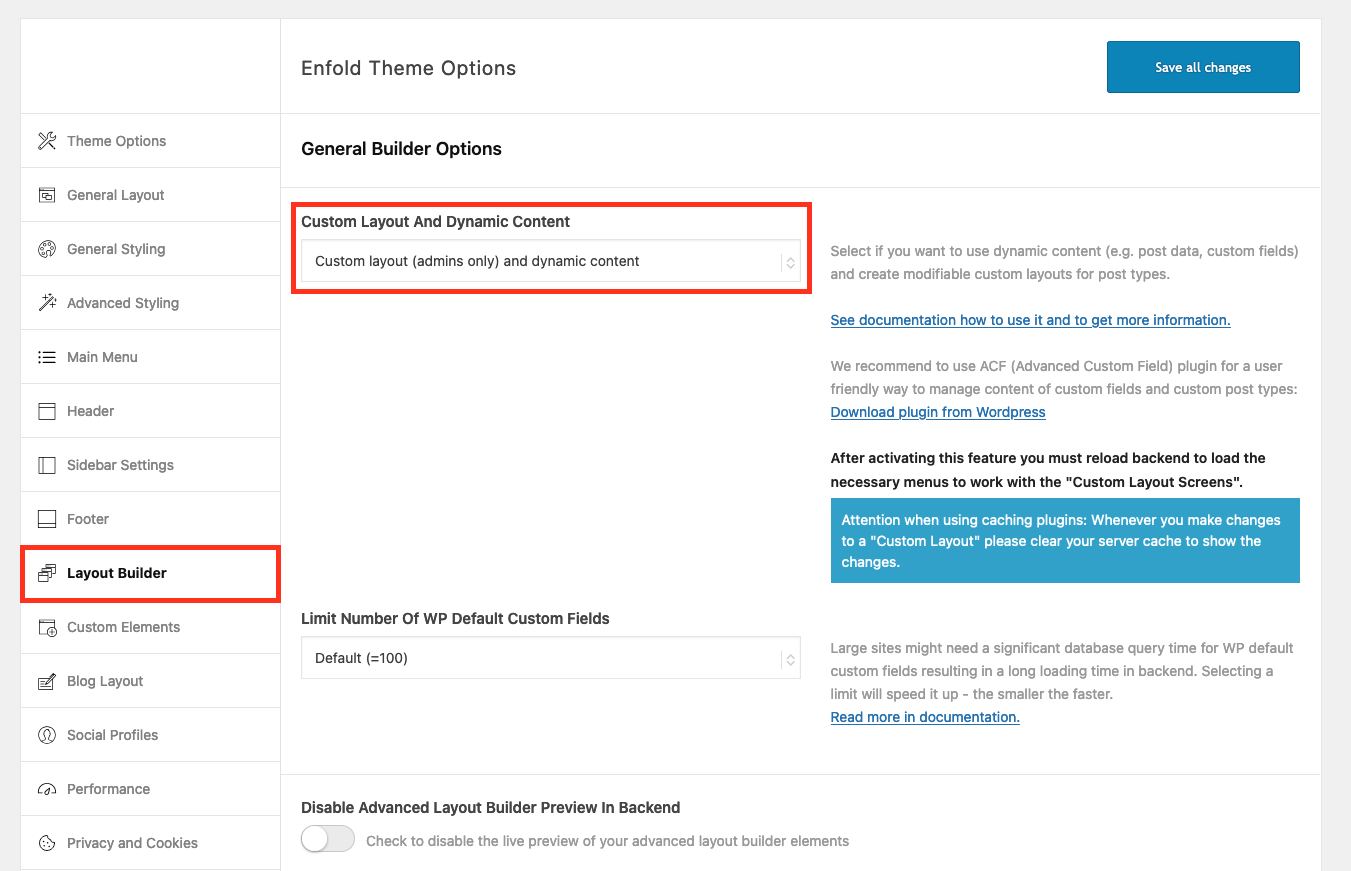
Theme Options -> Layout Builder -> Custom Layout And Dynamic Content

Activating the Custom Layout and Dynamic Content features in Enfold theme options > Layout Builder tab.

Dynamic Content

The Dynamic Content icon is displayed next to fields that support dynamic content.

Basic implementation is with shortcode.

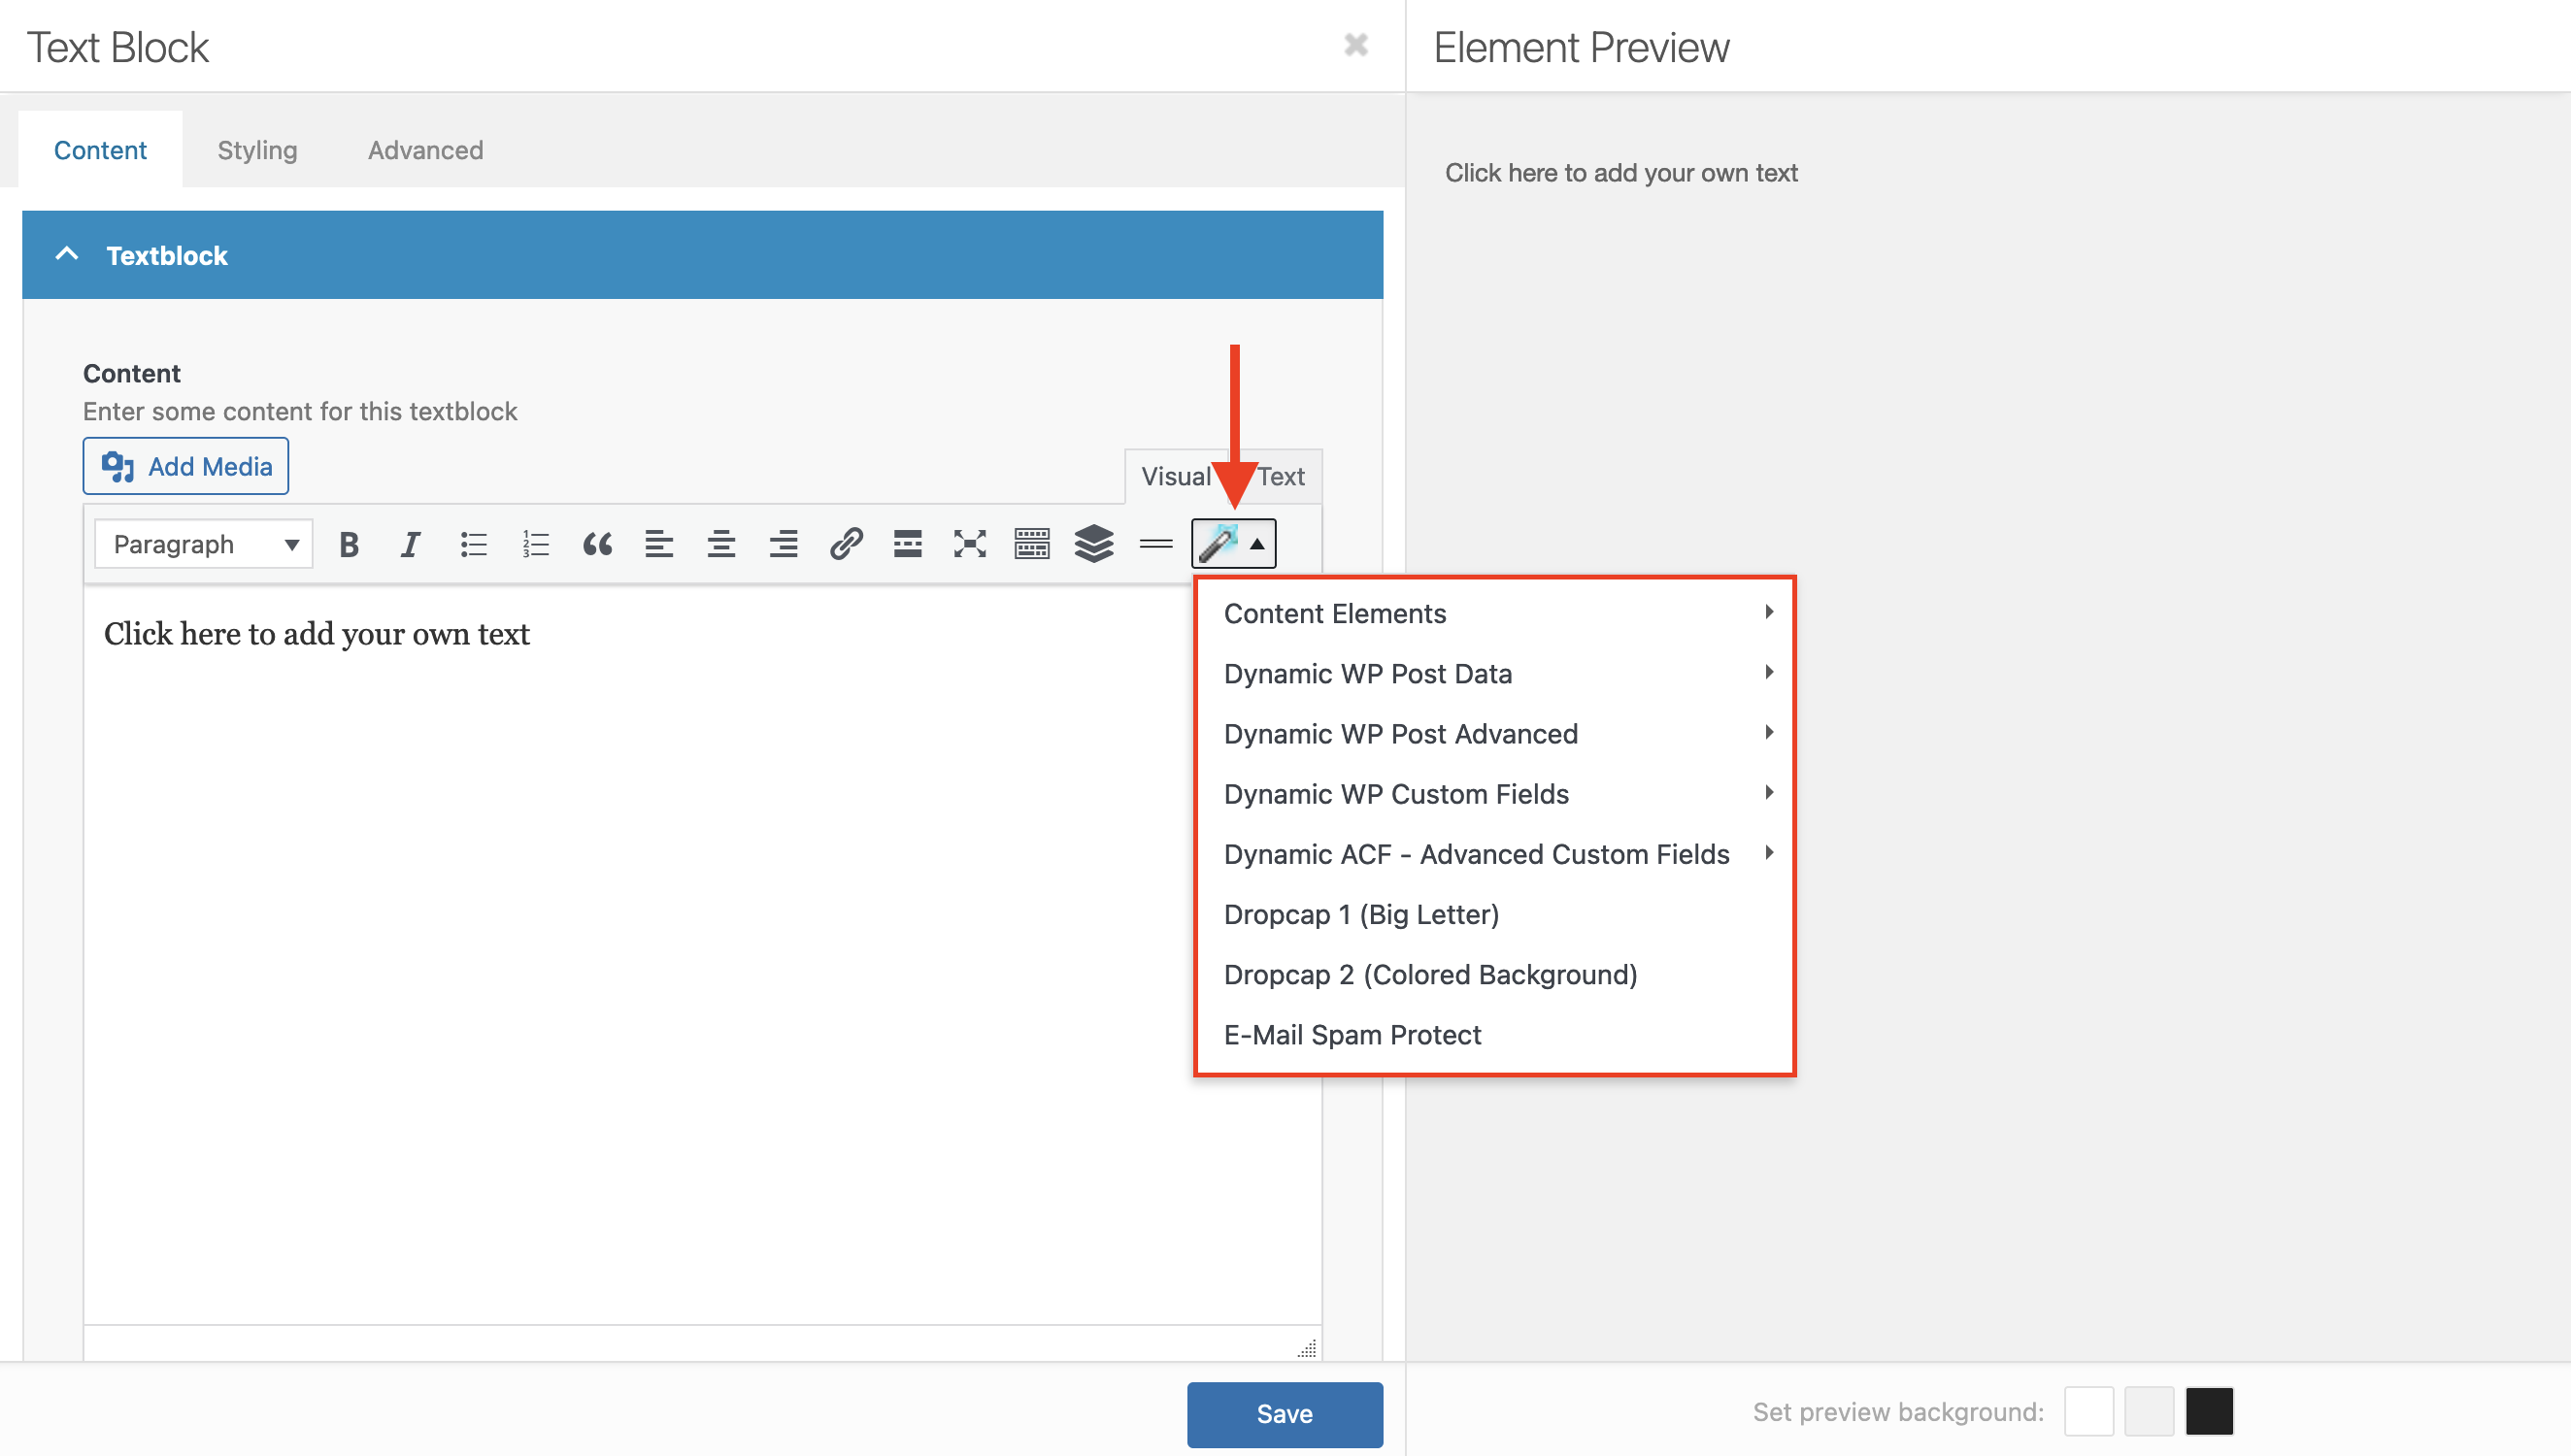
To make it easier for users there is also a shorthand implementation, which is replaced during pageload by the shortcode. This limits usage to “the_content” filter areas or areas that support dynamic content like ALB shortcodes. TinyMCE in classic editor posts also support shorthand syntax and offer it in the magic wand button together with the ALB shortcodes.

To avoid circular reference the content of post_content cannot be used by dynamic content.

Be careful when using shortcodes (esp. in custom fields) as this might lead to nested same named shortcodes which is not allowed in WP and the shortcode could also break the layout.

Shortcode

[av_dynamic_el src="" key="" default="" link="" linktext="" format=""]

Attributes not needed can be skipped.

To use it in ALB modal popup input fields you must use the following notation (otherwise it breaks ALB):

{av_dynamic_el src="" key="" default="" link="" linktext="" format=""}

For possible src values see enfold\config-templatebuilder\avia-template-builder\php\class-dynamic-content.php function register_dynamic_data_sources() (key in $this->shortcodes definition)

Shorthand

Shorthand uses the key of the array $this->shortcodes found in class aviaDynamicContent.

{key}

e.g. {wp_post_ID} {wp_post_title} {wp_post_date}

to access content of a custom field – e.g. “attribute_color”:

{wp_custom_field:attribute_color}

Shorthand returns the content of the custom field as string. You must use the shortcode notation if you need more control of formatted output or filter ‘avf_custom_field_format’.

Using a custom field content as link

This is only possible with shortcode (e.g.):

{av_dynamic_el src=”wp_custom_field” key=”my_custom_link” default=”localhost/dummy” link=”blank” linktext=”Homepage” format=”link”}

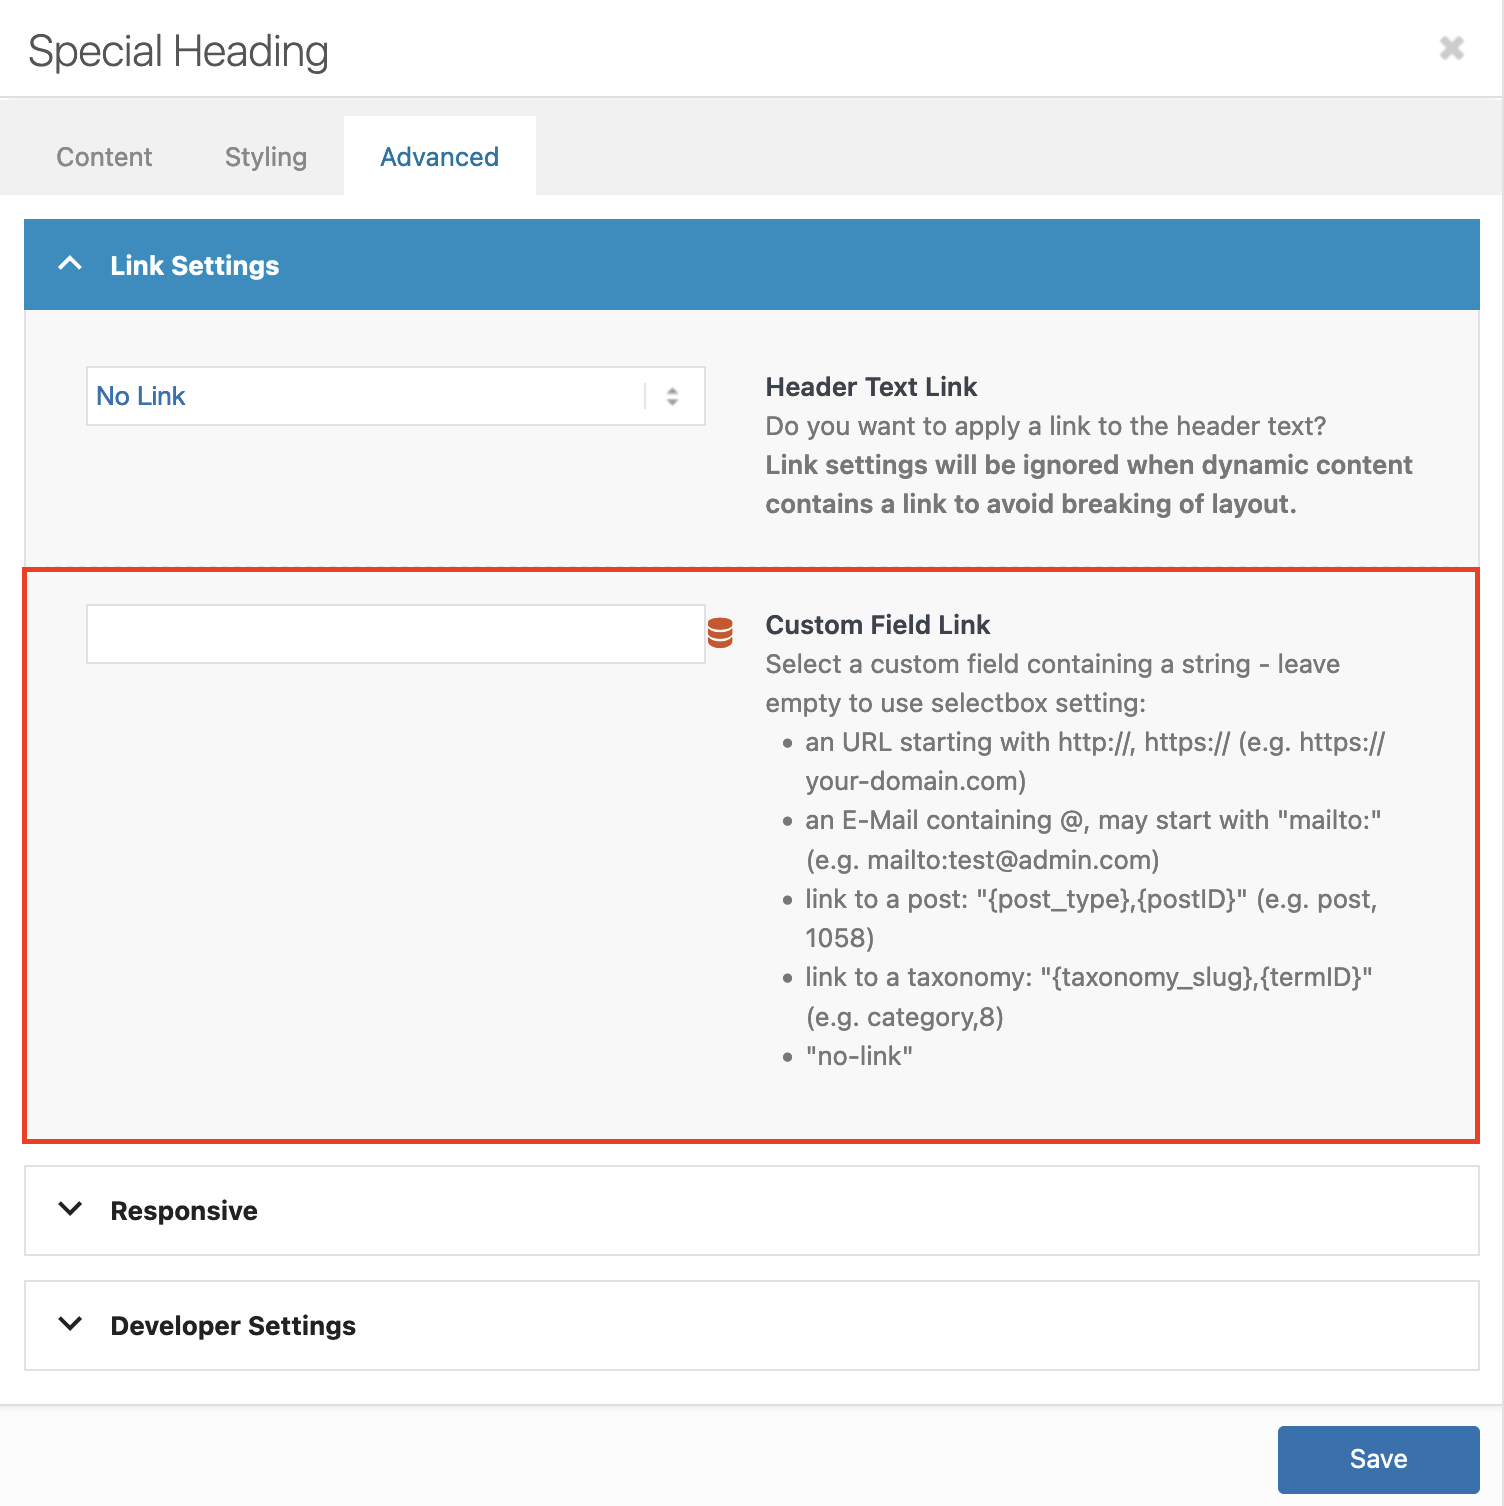
Replace Link settings (advanced tab) using custom fields

  • Go to Advanced -> Link Settings -> Custom Field Link
  • dropdown is limited to custom fields only, only 1 custom field is allowed
  • Read the description text below the element title for a valid custom field content

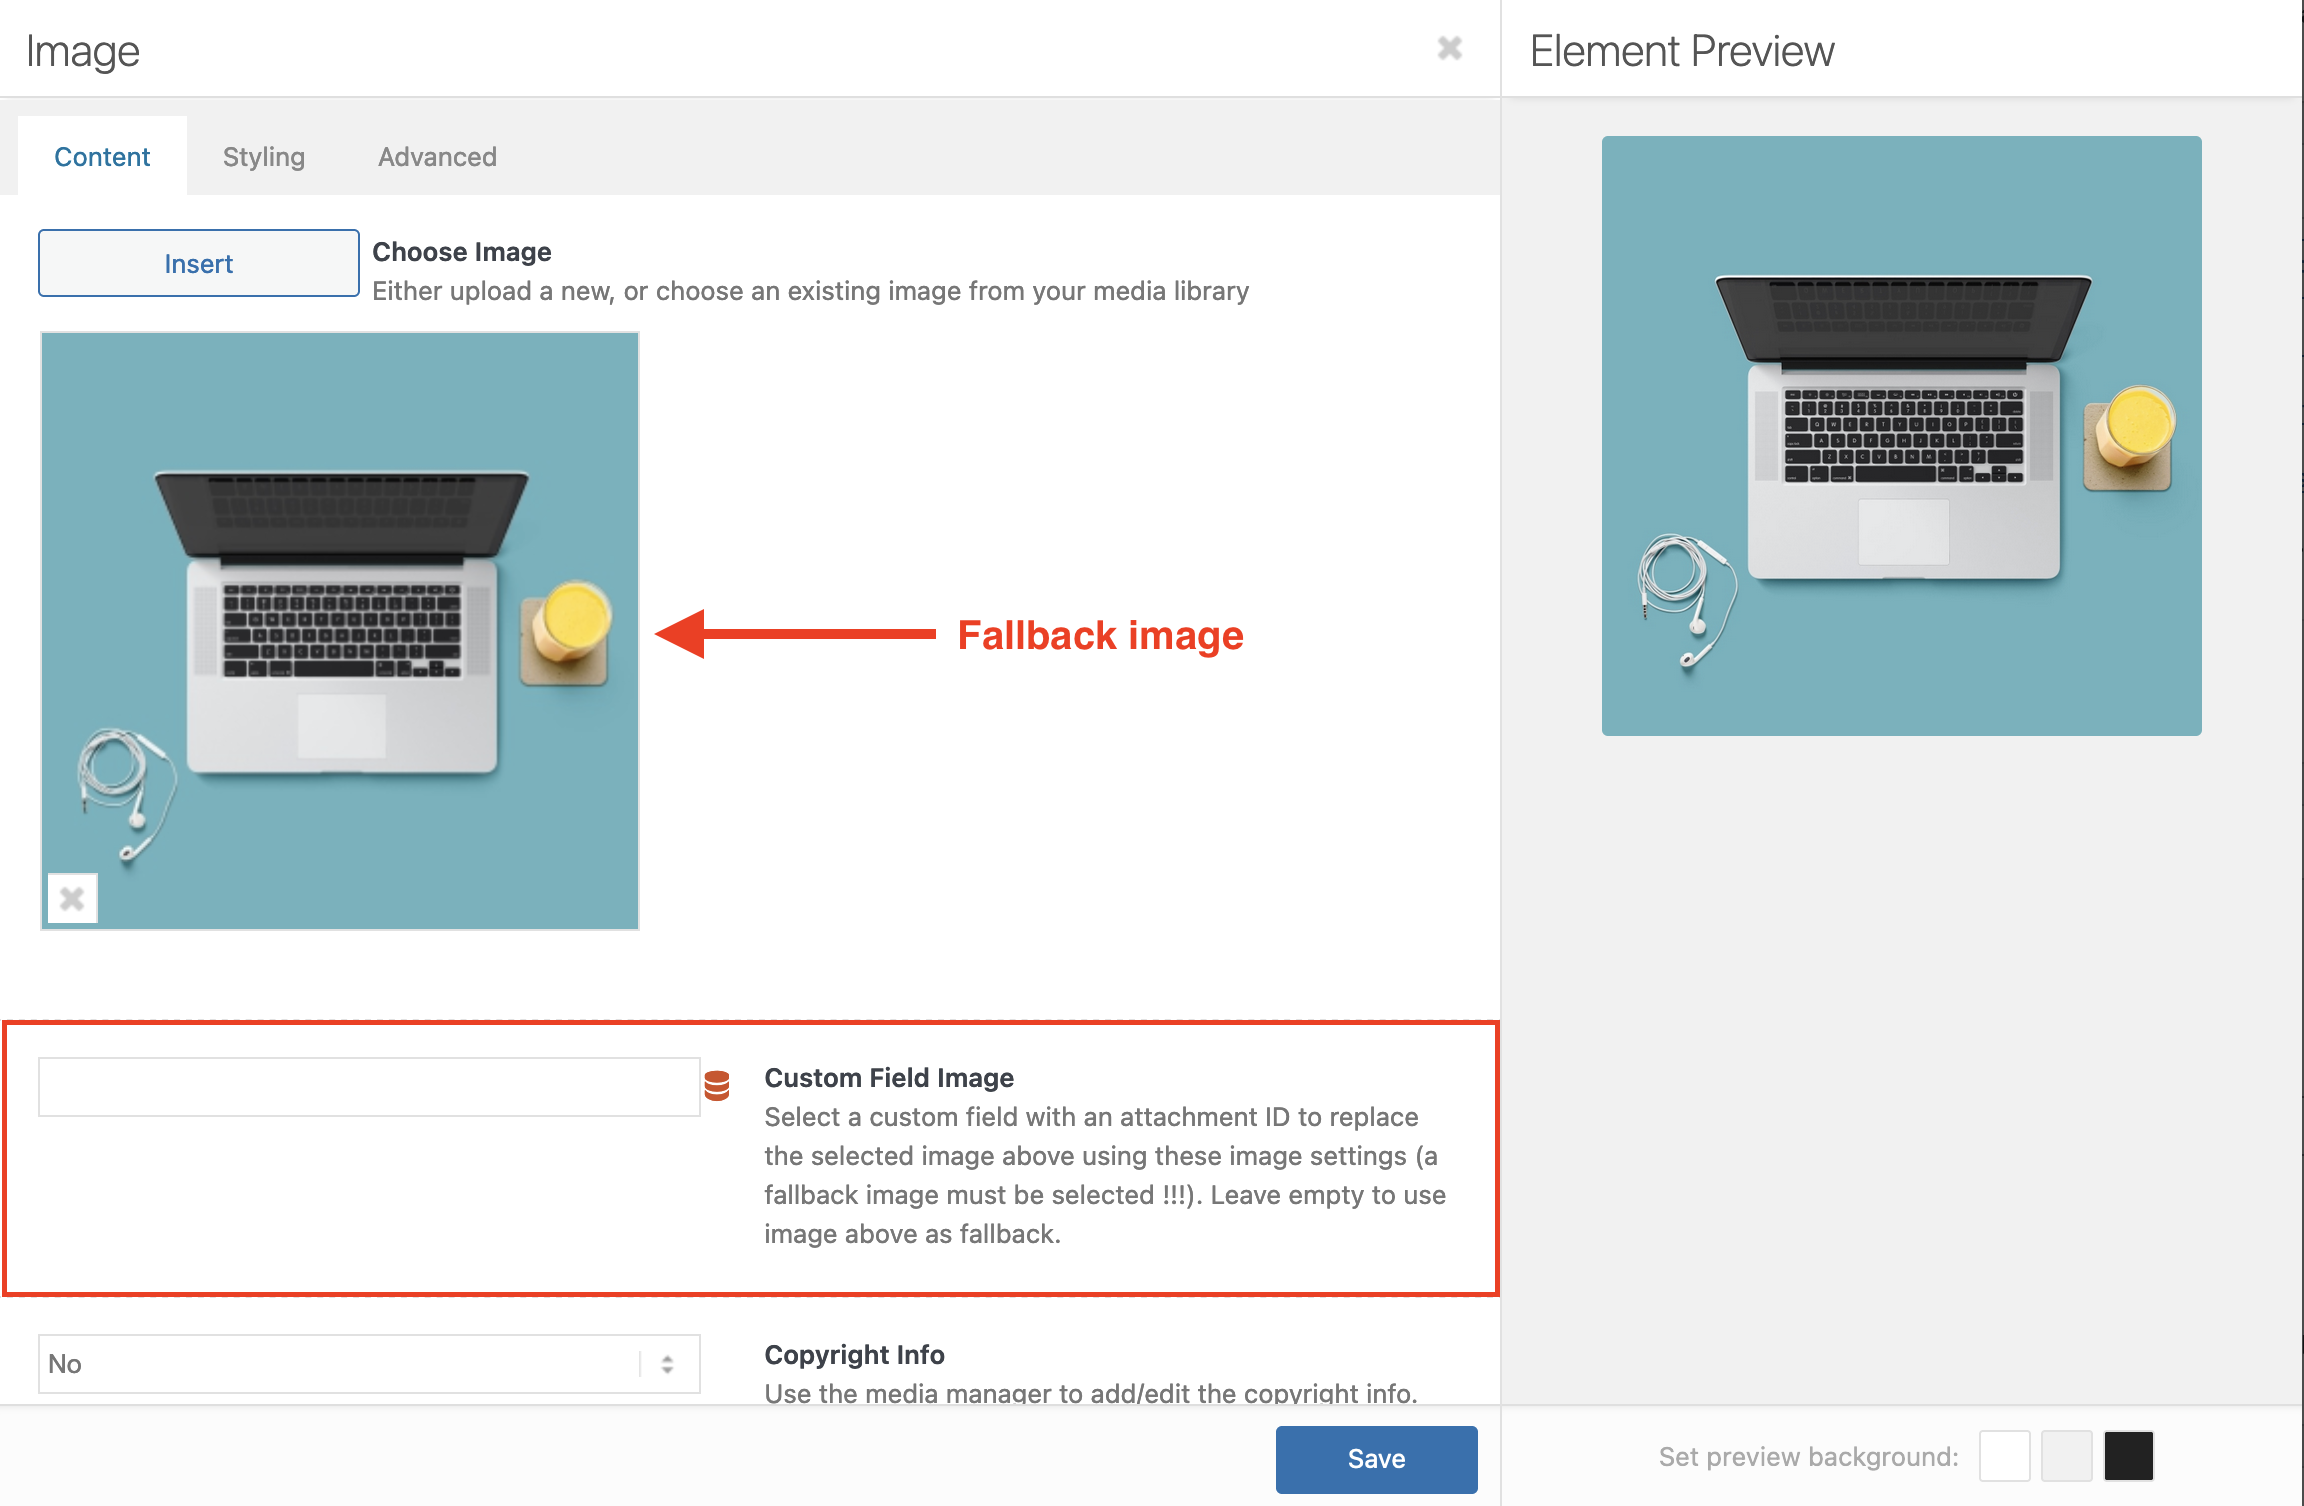
Replace images using custom fields

  • Go to Content -> Custom Field Image
  • dropdown is limited to custom fields only, only 1 custom field is allowed
  • content of custom field must be a valid attachment ID
  • a fallback image must be selected to display the Custom Field Image

Replace gallery images using custom fields

  • Go to Content -> Custom Field Gallery Images
  • dropdown is limited to custom fields only, only 1 custom field is allowed
  • content of custom field must be a comma seperated list of valid attachment ID’s

Custom Page Layout

Custom Page Layout is implemented as CPT and the posts must use ALB. To enable ALB on any CPT, please see https://kriesi.at/documentation/enfold/intro-to-layout-builder/#alb-for-any-post-type. Currently Excerpt, Categories and Tags are only for information to group them.

After activating the Custom Layout and Dynamic Content option in the Enfold theme options > Layout Builder, you should reload the page.

It allows to create layouts for complete pages or only part of pages. These layouts can be selected and added to posts with the ALB element Custom Page Layout.

Layouts can be changed at any time and these new changes are visible without the need to do any changes on the posts where they are used.

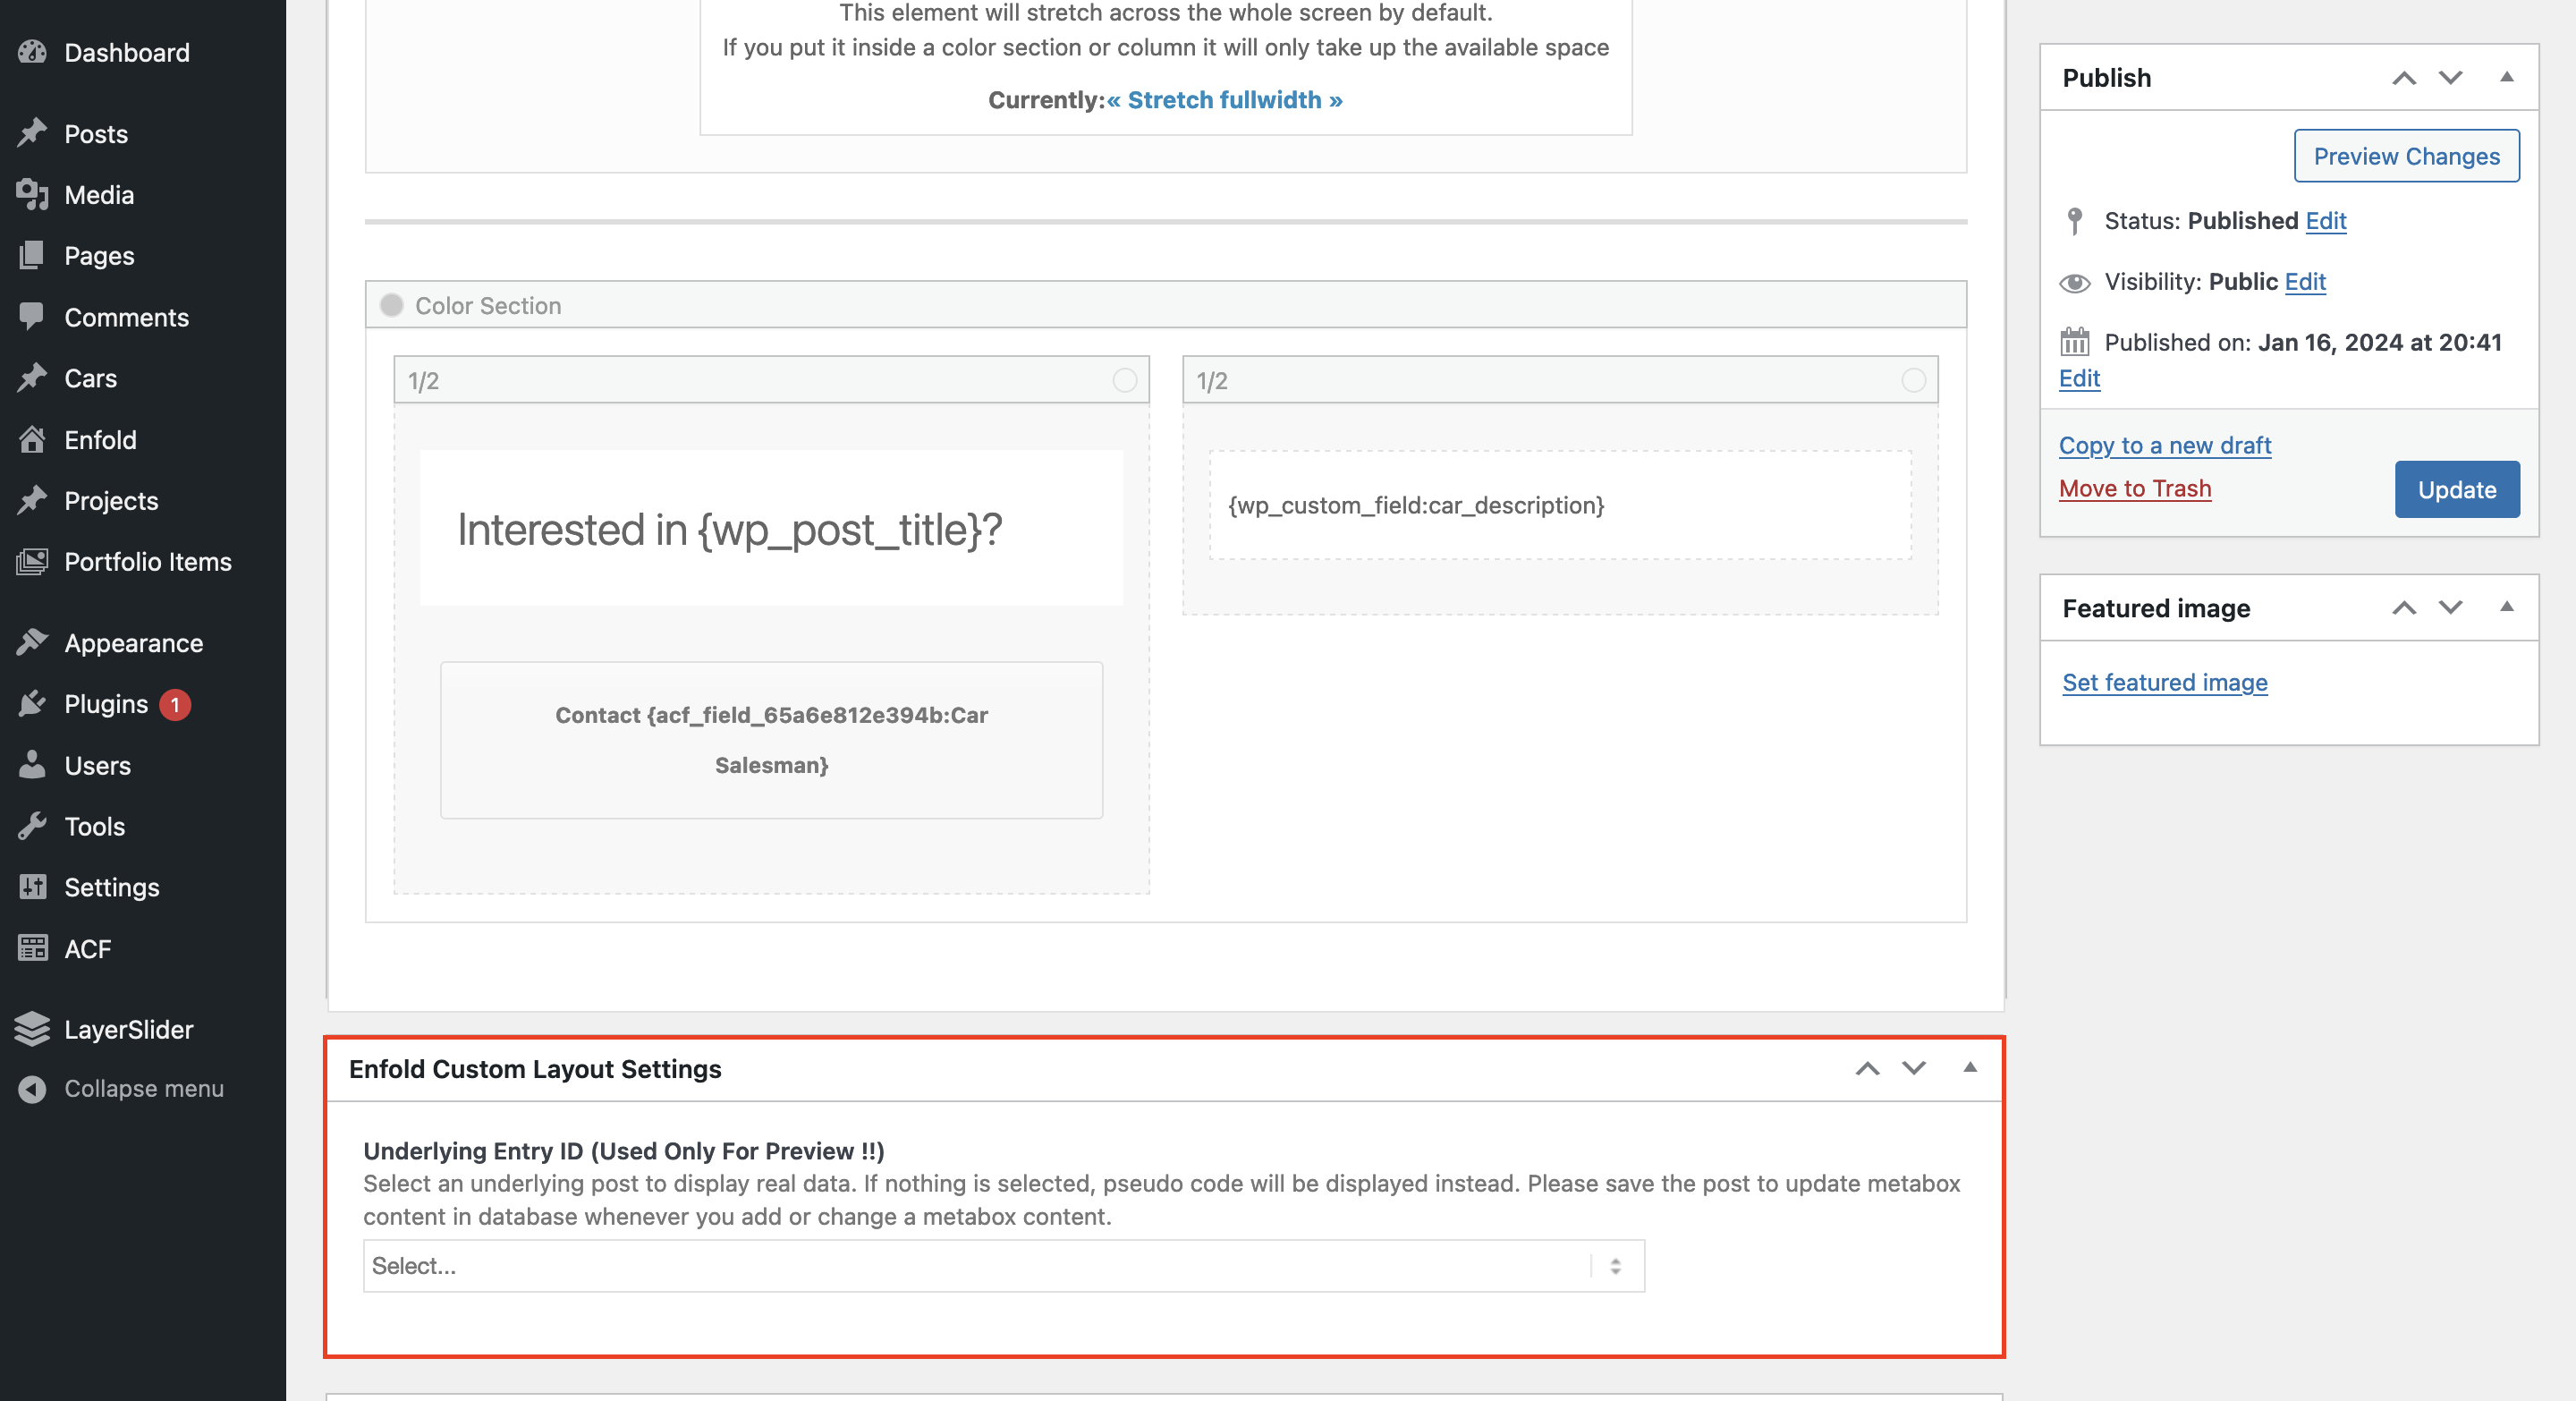
The Underlying Entry ID option is only needed during design of layout with ALB in backend to show real data for the Dynamic Content shortcodes in preview (modal popup and frontend preview) from the selected post.

The Underlying Entry ID option

If left empty Dynamic Content shortcodes will be displayed unchanged.

ALB Element Custom Page Layout

This element is based on the “Page Content” element, which will no longer be maintained.

It is a fullwidth element in the ALB canvas and adds its content 1:1 in the content flow.

It allows to select content from Custom Page Layout posts. In active beta is also to allow entries from other post types that support ALB and also to use non ALB content of classic editor and block editor posts.

ACF (Advanced Custom Fields) Support

The following ACF types can be used with dynamic content:

  • text
  • textarea
  • number
  • range
  • email
  • url
  • password
  • image
  • gallery (pro version)
  • link
  • post_object (multi select not supported)
  • page_link (multi select not supported)
  • date_picker
  • date_time_picker
  • time_picker
  • color_picker

The shortcode to access an ACF field is:

{av_dynamic_el src="acf" key="meta_key"}

meta_key can be:

  • acf_field_xxxx (= unique ACF ID)
  • field_xxxx (= unique ACF ID)
  • meta_key of custom field

Following logic is implemented for dropdown list:

  • new posts display all available ACF fields (this is ACF related)
  • after first time of saving the post only ACF fields available for that post type are available
  • changes made to ACF fields are visible only after saving the post !!!

It is possible to use ACF fields and custom fields also in “Custom Layouts”.

In backend if you specify an “Underlying Entry ID” the ACF fields are limited to the ACF fields for that post type, else all available ACF fields are displayed in the selectbox dropdown. Make sure that the specified post has been saved after ACF is activated and all fields have been added – otherwise you will see all ACF fields or only those that had been added prior to last save (this behaviour is ACF related).

In frontend the ACF fields and custom fields are used from the post, where the ALB element “Custom Layout” is used.

Custom Post Types

Custom Post types created with ACF (or by other means) can support ALB – but they need to be registered to ALB.

Starting with 6.0 there is a theme option:

Enfold -> Layout Builder -> Show advanced options -> Activate Your Custom Post Types For ALB

or you can use filter “avf_alb_supported_post_types”.

By default Enfold uses archive.php. You can add your customized template to your child theme using WP template hierarchie for post types and taxonomy (see https://developer.wordpress.org/themes/basics/template-hierarchy/#custom-taxonomies).

How to add Layout Metabox in backend when editing content of a CPT

  • Using ACF

ACF -> Post Type -> Edit -> Advanced Configuration -> Checkbox Enfold Layouts to show / hide

  • with filter ‘avf_metabox_layout_post_types’
function handler_avf_metabox_layout_post_types( $post_layout_types )
{
      $post_layout_types[] = 'your_post_type';

     return $post_layout_types;
}

add_filter( 'avf_metabox_layout_post_types', 'handler_avf_metabox_layout_post_types', 20, 1 );

To get a list of all registered CPT’s:

avia_CPT()->get_registered_metabox_layout_post_types()

Limitations

  • CPTs used in 3rd party plugins might not be compatible with ALB.
  • Hotspot locations in the Image with Hotspots element are always relative to the source image – make sure to use images that need the same locations.

Dismissible Admin Notice Box

$
0
0

Dismissible Admin Notice Box

Overview

Starting with Enfold 6.0 we add the possibility to add and manage custom admin notice boxes.

Features

  • Dismiss on single user base or for all users
  • Hide and dismiss / Hide only and dismiss with text “Dismiss”
  • Time limit or endless time to show to users before dismissed
  • Show box to users depending on capability
  • WP default admin box styling classes supported or custom styling
  • Content of box can be:
    • Plain text
    • Simple HTML
    • Complete custom HTML template

Implementation

  • Base class is implemented in enfold\framework\php\class-admin-notices.php
  • See enfold\framework\php\admin-notices\admin-notices-def.php for default boxes
  • See enfold\includes\admin\admin-notices\admin-notices-def-enfold.php for Enfold specific box content, allows to override default box content
  • Templates are placed in subfolder ..\admin-notices\templates but can be changed. We highly recommend to use full paths to template files because of include of php files

Important Methods

  • add_notice( $notice_keys, $expire = false, $save = true )
  • delete_notice( $notice_keys = null, $save = true )
  • get_current_notices()
  • get_all_notices()

Filters

  • ‘avf_admin_notices_definition_files’ – add paths to custom box definition files, this allows to override previous defined boxes
  • ‘avf_init_admin_notices’ – allows to alter the admin notice box array with definitions
  • ‘avf_admin_notices_filtered’ – for current user filtered notice boxes to display
  • ‘avf_skip_output_single_notice’ – skip output of notice box

SVG Icon Sets

$
0
0

Custom SVG Iconset

Starting with version 7.0 an SVG Icon Set based on iconfont entypo-fontello was added.

To use your own set of svg icons you need a zip file containing the svg files. This file can be uploaded via theme options page and then these svg icons can be selected.

Only icons needed on a page are added inline – so you are free to upload large sets of svg icons without producing an overhead on page load for not needed icons.

Use svg icon files to create svg icon set (Quick Setup)

  • Add all svg icon files in a folder “SVG”
  • Name of icon file (without svg) will be the name of the icon
  • Create a zip file where “SVG” is top directory
  • Name of zip file will become “name-of-font-set”

Use Fontello Iconfonts to create svg icon set

  • Create icon font with fontello (https://fontello.com/) and download zip (name it e.g. my-fontello)
  • Extract content in a directory
  • Use https://icomoon.io/app/#/select
  • Import my-fontello.svg from extracted folder – button “Import Icons” on left top
  • https://icomoon.io/app also offers free icons (see button “Icon Library” at left top or at bottom “Import from Library”)
  • Select the icons you want, you can also combine them from different libraries
  • You can also (see buttons at top)
    • remove icons not needed
    • move the icons to change order
    • edit icons
  • When ready click “Generate SVG and More” at bottom
  • use descriptive names for the icons – each icon must have a unique name, this name is also used for the svg file
  • Click “Preferences” icon at bottom or button at top and change the settings (these settings are not used by Enfold, but needed if you want to use the file “symbol-defs.svg”)
    • “Name” will be the name of the zip file and later the name of the font used in Enfold to group the svg icons (e.g. my-fontello)
  • Click “Download” at bottom to generate zip file e.g. my-fontello.zip that can be uploaded to theme
  • Inside the zip file you find:
    • folder “SVG” containing all icons as single .svg files wrapped in svg tags
    • file “symbol-defs.svg” containing the svg icons wrapped in symbol tag in a svg container
    • styles.css containing main style and extra styles for the icons (can be loaded on page load when using “symbol-defs.svg” )
    • file selection.json contains info icon font <<->> svg icons
    • file svgxuse.js is a polyfill to support older browsers like IE 9+
    • and some more files

Enfold only needs folder “SVG”, all other files are optional and not needed/used

Use any svg iconfont file to create svg icon set

  • https://icomoon.io/app/#/select supports upload of any svg iconfont file – button “Import Icons” on left top
  • select the svg file from the icon font (e.g. my-fontello.svg)
  • select the icons you like to combine in a single set
  • same steps as described above for export

Use svg icon files to create svg icon set

  • https://icomoon.io/app/#/select supports upload of multiple single svg icon files – button “Import Icons” on left top
  • upload all svg icon files you like
  • select the icons you like to combine in a single set
  • same steps as described above for export

Uploading svg icon sets via theme backend

  • content of zip file must contain directory SVG containing all svg icon files
  • additional files as described above when generated with icomoon will be recognized for import – but they are optional and not used by Enfold
  • Theme Options -> Import/Export ->SVG Icons and Iconfont Manager – same button for icon fonts and svg icon sets, will be recognized internally by content of zip file
  • name of zip file will be used as “name-of-font-set” (e.g. my-fontello.zip will become my-fontello)
  • to store content of zip file a folder will be created similar to icon font in folder dynamic_avia/avia_icon_fonts/svg_”name-of-font-set”:
    • SVG directory with all single svg files
    • style.css
    • symbol-defs.svg
  • we will extract infos in config files for easier access later during upload:
    • charmap.php
    • config.json
  • SVG set will be grouped in svg_”name-of-font-set” in icon select window (e.g. svg_my-fontello)

Using SVG icons in ALB Elements

  • in icon select window you find e.g. “SVG Icons: svg_my-fontello”.
  • icons in this group have a unique name (e.g. note)
  • select the icon you want (similar to icon font)

Using SVG icons in “Social Profiles”

  • svg icons have “SVG” added (e.g. Facebook SVG)

Using SVG icons in “Blog Layout”

  • svg icons have “SVG” added (e.g. Facebook SVG)

DEVELOPER SECTION

The following snippets provide support for SVG icons and iconfont icons.

Using SVG Icon in ALB element

At beginning of class add:


use \aviaBuilder\traits\modalIconfontHelper;

In function get_element_styles():


$element_styling->add_classes( 'container-icon', avia_font_manager::get_frontend_icon_classes( $atts['font'] ) );

In function shortcode_handler():

Using SVG Icon in common:

Using SVG shortcut icons:

Viewing all 80 articles
Browse latest View live